Homemade Paneer

Paneer is a staple in any Indian household.  It is so versatile, the possibilities are endless.  I’ve marinated it in Roasted Cilantro Mint Chutney and grilled it over the BBQ, you can also grill it and use it as an addition to a salad, make Paneer Cabbage Cups, Matar Paneer, and most famously known Palak Paneer.
IMG_7724
It may sound daunting but making paneer at home is actually very easy.  There’s literally 2 ingredients involved – milk, and an acidic agent to separate the curd.  I like homemade better than store bought because you can choose which type of milk you want (low-fat or full-fat) and there are no preservatives like in the store bought ones.
IMG_7729
How to make paneer at home:
Step 1: Boil the milk
wp-1594759805429.jpg
Step 2: Add in your acidic agent and keep stirring to help the solids separate from the whey
wp-1594759805625.jpg
Step 3: Drain the whey so you have just the solids left over
wp-1594759805651.jpg
Step 4: Rinse the solids to remove smell and taste of acidic agent
wp-1594759805682.jpg
Step 5: Squeeze out excess water and hang the paneer to remove moisture
wp-15947598063348295635027067768567.jpg
Step 6: Mold the paneer into desired shape
IMG_7724
Step 7: Remove the block of paneer from the cheesecloth and use as desired
IMG_7730
Notes:
1. I suggest double lining the cheesecloth so that it is more sturdy and holds the paneer well when draining. This is the cheesecloth that I use and love!
2. Acidic agents that can be used are lemon juice or vinegar.  I’ve found vinegar works better with curdling the solids without leaving behind a tart taste in the paneer
3. Keep the acidic agent close by so you can use it as soon as the milk is ready so it doesn’t boil over.
4. If you need to add more acid, add a teaspoon at a time.  Adding too much can make the paneer rubbery

From my kitchen to yours, I hope you have fun and enjoy making your own paneer!

Pineapple Fried Rice

I’m all about summer and summer foods these days.  This Pineapple Fried Rice is the perfect balance between sweet, spicy, crunchy, soft, and a burst of flavors.  Best of all, it takes 20 minutes to make!  A fun weeknight recipe, or a weekend recipe with some Thai Curry on the side.  Go ahead, try this out and bring a taste of Thailand to your home.
Continue reading “Pineapple Fried Rice”

Paneer Cabbage Cups

Paneer Cabbage Cups are a light and healthy dish that is packed with a burst of flavor and texture in each bite.  The spicy jalapeño, a pop of lemon, the crunch of the cabbage and the creaminess of the paneer and avocados.  And if you know me, the vibrant colors of all the different veggies bring this together in the most perfect way.  You just can’t go wrong!  Continue reading “Paneer Cabbage Cups”

The Best Veggie Quesadillas

There’s no wrong way to make a quesadilla.  It’s one of those foods that can be served as a quick weeknight meal, an after school snack, bite sized as a party app; filled with just cheese, grilled veggies, or shredded meat! The possibilities are endless.
Continue reading “The Best Veggie Quesadillas”

Brown Butter Toasted Tortellini Yum

I’m a pasta lover and and am so proud to say so are my girls.  I can get them to eat almost anything as long as I pair it with pasta.  The only caveat, they keep changing what type of sauce they want.  First, I couldn’t get them to eat anything but marinara sauce, then they moved on to pesto, and now they are stuck on brown butter. Continue reading “Brown Butter Toasted Tortellini Yum

Greek Inspired Crepes Yum

This recipe is one of my favorites.  I learned it almost 4 years ago in Arizona.  We had gone for the weekend to hang out with Pankaj’s friends from college.  It was Sunday morning and we decided to do a fun brunch.  Rupal (our friend who we went to visit) suggested we make Greek Crepes.  OMG have I been hooked on them since! I don’t know about her, but I know I definitely stumbled through this one, pretending I knew what I was doing when in fact, all I knew how to do was make the crepes.  The Greek part was literally Greek to me. Continue reading “Greek Inspired Crepes Yum

Roasted Brussels Sprouts Salad Yum

Brussels Sprouts are a vegetable that I didn’t realize I liked until I was an adult, going out on the town and pretending to eat it like I loved it with friends who actually did.  One day, I realized, I actually do like it.  Especially when they’ve been either fried or roasted so the outer leaves are nice and crunchy….ummm, I’m salivating just thinking about them again! Continue reading “Roasted Brussels Sprouts Salad Yum

Butternut Squash and Thyme Risotto Yum

One of my favorite Italian dishes is risotto.  It’s so creamy, decadent, and delicious.  I started experimenting with the basics of making risotto about 9 months ago.
When I first started making it, I was a little intimidated.  To be honest, I had to work up my nerve to attempt it for quite a while as I had heard stories about how hard it is to make risotto.  One day, I decided to just go for it.  If nothing else, I have frozen pizza to serve the family.  (Yep, I always have frozen pizza on hand …. though, currently I stock this amazing cauliflower crust pizza with veggies on top.  Ummm, anyways, story for another time.)
wp-1585664509695.jpg
I must have looked through a dozen recipes to see which didn’t intimidate me and seemed the easiest.  In hindsight, they are all easy.  You see, I think people get overwhelmed with the idea that you have to babysit this dish.  You literally do.  It’s not a quick and easy weeknight dinner but it is an amazing labor of love.  From start to finish, I would say cooking this specific dish (we’re including the time to roast the squash), I spent about an hour in front of the stove.  About 80% of that is stirring the risotto so it doesn’t stick, 10% was prep work and 10% was zoning out the kids while they screamed their latest rock concert with Frozen lyrics.
wp-1585664508500.jpg
The secret to a perfect risotto, you have to stir the broth in one ladle at a time.  Yep, a bit tedious, but this is definitely one of those times where patience brings very delectable rewards.
wp-1585422275201.jpg
During my extensive research to find an “easy” recipe for risotto, I also looked into why I couldn’t just add the broth all at once.  One reason that I found for adding the broth slowly is that by doing so, the rice releases the starch slowly and therefore, giving the dish its creamy texture.  Adding the broth all at once, covering it and leaving it to cook can ruin your risotto in two different ways.  One, the water will sit at the bottom from lack of stirring the risotto and can burn the dish from the bottom.  Second, instead of giving the risotto its creamy texture, dumping the broth all at once can make break the rice and make it mushy rather than keeping the rice kernels whole but cooked and creamy.


I know this seems like a lot but really, it’s just reinforcing the fact that you need to add your broth slowly and you will have an amazing risotto.
wp-1585664508642.jpg
The only other tip I want to add is to constantly check for salt.  I used veggie bouillon combined with water for my broth in this recipe.  You can use a low sodium broth also.  The bouillons tend to have a higher sodium content so don’t add salt until you’ve tasted it.  The parmesan cheese also brings a lot of salt content with it.  The last thing you want to end up with a salty risotto you can barely eat (trust me, I’ve done this too.  Speaking from unfortunate experience).  Keep tasting as you go.
Fun fact, arborio rice looks very similar to idli rice.  In fact, I picked it up and almost used it before I realized there was a slight difference.  The idli rice is a little plumper than arborio.  Of course, I did more research and found that idli rice can be used as a substitute for arborio because of its a medium grain.  When you compare the two side by side, they look very similar.

From my kitchen to yours, Enjoy!

Ingredients:
1½ c butternut squash, cubed
1 ½ c arborio rice
1 med onion, diced finely
5 cloves garlic, minced
3 Tbsp thyme, roughly chopped
6 c veggie broth
1 c Parmesan cheese
¾ tsp salt
1 tsp ground black pepper
2 Tbsp Oil (Avo or EVOO)

Directions:
Preheat oven to 400ºF.  Toss squash with 1 Tbsp oil, salt and pepper.  Spread out on a baking sheet and bake for 20-25 minutes.
In a large pot, heat veggie broth until it comes to a boil, then lower the heat to low and cover.
Meanwhile, In a deep and wide pan, heat oil and add onions.  Cook for 7-8 minutes until they are cooked through and translucent.
Add in the garlic and cook for 1 minute on med-low flame.  Add in the risotto and 2 Tbsp thyme and cook for 8-10 minutes until the rice is toasted and has a light golden red color to it.
Add in 1 ladle of broth and wait for it to burn off while you keep stirring the risotto.  As it burns off.  Keep adding the broth 1 ladle at a time until you use up all of the broth.  As the risotto cooks with the broth, you’ll notice it getting plumper and creamier.  When all of the broth is used up, and cooked into the risotto, the texture should be thick and creamy.  Turn off the heat and mix in ¾ c Parmesan and mix well.
Add in the butternut squash and remaining thyme and mix.
Serve hot into bowl and garnish with some of the remaining Parmesan cheese.

Enjoy!

Crispy Chickpeas and Sweet Potato Tacos Yum

When I first started experimenting with this recipe, I wasn’t sure how the sweet potato was going to work in my tacos.  I debated constantly trying to pair a different vegetable, but ultimately, I kept coming back to the sweet potatoes. Continue reading “Crispy Chickpeas and Sweet Potato Tacos Yum

Veggie Pasta Sauce Yum

When my kids were younger, I had a bit of a hard time getting them to eat certain vegetables.  Even today, my oldest will not eat any type of leafy green because it’s a “salad” and she doesn’t eat salads apparently.  My youngest pretty much copies her Sissy and does whatever she says.  Sanaya loves spinach….. if it’s cooked down into a saag, blended into her Popeye muffins or hidden in this veggie sauce.
20180803_172940.jpg
This recipe came into being when Aishani was new to eating foods at about almost 1 year old.  Sanaya used to love pasta and Aishani liked it because she was all about finger foods and rotini was big enough for her to hold in her cute little pudgy hands.  Added benefit, I can make a batch, freeze it for future use on a last minute day.
20180803_170102.jpg
I load this pasta sauce up with onions, carrots, bell peppers, spinach, and frozen mixed veggies.  I also add tons of spices including turmeric, especially in the winter which is rich in it’s anti-inflammatory properties.  It’s such a healthy pasta sauce and my wonderful kids don’t even notice further than it being a red pasta sauce.  Try it out…. trick your kids or even spouse and see if they notice the difference!
20180803_172931.jpg

20180803_174235.jpg
From my kitchen to yours, Enjoy!

Ingredients:
1 med onion, chopped finely
1 bell pepper, chopped finely
1 carrot, chopped finely
¼ c frozen mixed veggies
¼ c spinach
3 cloves garlic, minced
1 jar (about 1½ pounds) your favorite pasta sauce
¼ tsp ajwain (carom seeds)
¼ tsp haldi (turmeric)
½ tsp lal mirch (cayenne pepper)
¾ tsp cumin powder
1 tsp coriander powder
2 tsp Italian seasoning
1 Tbsp Avocado (or Olive) Oil
salt to taste
pepper to taste

Directions:
In a deep pot, heat oil on medium flame.  Add in the carom seeds.  When they splutter, add in the onions and sauté until translucent, about 3-5 minutes.  Add in garlic and sauté for another 30 seconds.  Add in the turmeric, and let it bloom for about 30 seconds.
Once the turmeric has mixed in well, add in all the veggies except the spinach, spices, salt and pepper.  Mix well and cook for about 10 minutes or until they are tender.  Finally add in the spinach and sauce and cook for 2 minutes stirring constantly.
Turn the flame off and with a hand blender, blend the veggies into the sauce.  You should get a chunky consistency though if you prefer a more smooth texture, you can blend in a blender.  If it’s too thick, add 1 Tbsp of water at a time until you achieve your desired consistency.
Taste and adjust for salt.

Serve with your favorite pasta!

Zucchini Corn Cakes on a bed of Grilled Peach and Pineapple Salsa

Phew! That’s a long name for sure.  And the name lives up to the punch that it packs!  We had a BBQ on the 4th and had plenty of food leftover.  I definitely didn’t want to eat the same stuff for the next few days so I figured, this is when I need to get creative and upcycle it. Continue reading “Zucchini Corn Cakes on a bed of Grilled Peach and Pineapple Salsa”

Polenta & Veggie Pot Pie

I love rainy days!  All I want to do is curl up with a blanket in front of the fireplace, read a book with a cup of chai in my hand.  That probably won’t happen till my kids are off to school.

In the meantime, I decided to put together a hearty stew that warms you from your fingers to your toes.  I took the stew a little further and decided to put a spin on it.  I made cute pot pies but instead of the traditional pastry shell, I used polenta and cheese for the crust.  It tasted so delicious, the creamy polenta and the melted cheese just got all of us, especially my daughter hooked!

20180226_183825.jpg

I have these cute little Le Creuset cocottes that I got as a gift from our close friends a few years ago and thought my 2.5 year old will get a kick out of eating from it.  And boy was I right!  She insisted on eating her leftovers the next day from these adorable pots!  I was just happy she loved the stew as much as the cocottes!

20180226_184128.jpg

I hope these warm you up on a cold rainy (or snowy) day like it did us!

Ingredients:
½ onion, chopped finely
1c cubed butternut squash
1 jalapeño, seeded and chopped
2 cloves garlic, minced
1 14.5oz can black beans, drained and rinsed
¼c AP flour
2Tbsp tomato paste
2Tbsp cayenne pepper
1tsp smoked paprika
1tsp cumin powder
¼tsp oregano
½tsp salt (or to taste)
¼tsp ground black pepper
2c veggie broth
1Tbsp Sriracha sauce
¼c milk
2Tbsp EVOO

For the Polenta:
2c Veggie Broth
2c milk
1c Polenta
¼tsp salt
¼tsp pepper
3Tbsp Butter
3oz sharp cheddar cheese, shredded

Directions:
Preheat oven to 400ºF.

In a nonstick pan, over medium heat, add EVOO.  Once the oil is heated, add onions and sauté for a couple of minutes.  Add garlic and cook for another 30 seconds.  Now add the butternut squash and for about 10 minutes or until it becomes tender.  Make sure you don’t over cook it as the squash can get a mushy texture.  Add in all the dry spices and mix well.  Cook with the spices for a 1-2 minutes so they bloom and flavor the squash.  Now, sprinkle in the flour.  Stir for about 3 minutes so the flour cooks.  If the flour doesn’t cook through, you’ll be able to taste a raw, gritty flavor which is so unappetizing.  Add the veggie broth, tomato paste, and Sriracha, raise to a simmer and cook until it has thickened.  Once it has thickened, add in the milk and black beans.  Cook for another 5 minutes.  Taste and adjust for salt.

Spoon the mixture into 4 individual baking dishes or one pie pan and place on a baking sheet with a 2 inch lip.

For the polenta, add the veggie broth and milk in a saucepan and bring to a boil.  Lower the heat and whisk in the polenta slowly.  If you add it all at once, the polenta will be lumpy and not cook through.  Keep stirring until the polenta thickens, approximately 10-12 minutes.  Add in the butter and season with salt and pepper.  Spoon the polenta over the pot pie filling and top with cheese.

Bake in the oven for about 18-20 minutes or until the polenta is golden brown and the cheese is melted.
Remove from oven, garnish with fresh parsley and let it warm you to your toes as you dig in to this deliciousness!

20180226_184130.jpg

Zucchini Tacos

I’m addicted to cooking shows.  There.  I said it. I admit it.  I guess it’s not bad considering other things people are addicted to these days.  Every Saturday mornings, you can find me glued in front of the television watching my favorite show, The Kitchen.  I can’t bear to miss a single episode.  A few weeks ago, they had guest chef Nikki Dinki on the show who shared her zucchini tacos recipe and instantly I knew I had to try those.

They are amazing!  Forget eating them as tacos, my DH ate them on its own.  SO DELICIOUS!  I did make a few slight changes to her recipe to adjust for ingredients I had in the kitchen/pantry.  Hope you enjoy them as much as we did!


Ingredients:
4 medium zucchini, shredded
2/3 c shredded Mozarella cheese
2/3 c Italian bread crumbs
2 eggs
1 tsp cayenne powder
1 tsp cumin powder
1/2 tsp salt
1/2 tsp garlic powder
Olive Oil Cooking SprayDirections:
Preheat oven to 450ºF.Place shredded zucchini in microwave safe bowl and heat on high for for about 3 1/2 minutes.  Mix the zucchini around and replace in microwave for another 3 1/2 minutes.  Let it cool then place in a cheesecloth and drain as much of the water out as you can.  The drier it is, the better your batter and taco shells will turn out.

Add the eggs, cheese, bread crumbs, cayenne, cumin, salt and garlic powder.  Mix well into a dough-ish batter.  Line a baking sheet with parchment paper and spray lightly with Olive Oil Cooking Spray.

Make 8 portions in the shape of balls from the batter, the size just a tad smaller than a tennis ball.  Flatten them directly onto the baking sheet into 5″ diameter rounds with your hands.  They shouldn’t be too thick as the inside will not cook properly.  Bake for 15 minutes.  The taco shells should be slightly golden brown.  Once you remove them from the oven, let them cool slightly before adding filling to shells.

Enjoy!

Original recipe by Nikki Dinki

Pomegranate Eggplant

IMG_5081

This is one of my favorite recipes.  It’s such a simple go to; you can wow friends and family, or just make it for dinner when you’re short on time or feel lazy enough to not make something elaborate.  I originally found this recipe in a cookbook by Yotam Ottolenghi.  I’ve since adapted it to suit my palate but regardless of which version you try, I’m sure you’ll love the impact of so many flavors and textures packed in such few ingredients.

Here’s what I did:
Preheat your oven to 400°F.

Chop the eggplant into 2 inch cubes.  Add in dried thyme, rosemary, salt, crushed chili flakes, and olive oil.  Toss it all to mix well.
IMG_5044

Line a baking sheet with some aluminum foil and place the eggplant on there, skin side down.
IMG_5046

Bake for 20-25 minutes, until the eggplant is cooked through.  Make sure it’s not overcooked, otherwise, it gets mushy and definitely does not taste good!

The eggplant should look something like this:
IMG_5072

When you’re ready to serve, plate up some eggplant and drizzle a little tzatziki sauce over it.  Finally, sprinkle some pomegranate seeds and enjoy.

IMG_5080

Ingredients:
1 large eggplant, skin on, chopped in 2″ cubes
1 Tbsp dried thyme
1 Tbsp dried rosemary
1 Tbsp crushed red chili flakes
generous pinch of salt
1 Tbsp EVOO
1/2 c pomegranate seeds

Directions:
Preheat oven to 400°F
In a bowl, mix in the eggplant with the thyme, rosemary, dried chili flakes, salt and olive oil.  Toss well so every piece of the eggplant is covered with all the herbs.
Line a baking sheet with aluminum foil and place the eggplant on there skin side down.
Bake 20-25 minutes until the eggplant is cooked through.
When you’re ready to serve, drizzle with tzatziki sauce  and top off with pomegranate seeds.

If you’re interested in the original recipe by Yotam Ottolenghi, click here.

Veggie Stuffed Peppers

There are many days recently where we end up eating leftovers because well, with a 4 month old who wants all the attention, it’s hard to spend time in the kitchen when her drooly smile beckons you to play.  Today however, the husband became the center of her attention allowing me a few moments to whip up veggie stuffed peppers.  Layered with rice, veggies and definitely cheese – this is one yummy pepper!

There are a couple different parts to it so bear with me.  Here’s how I made it:
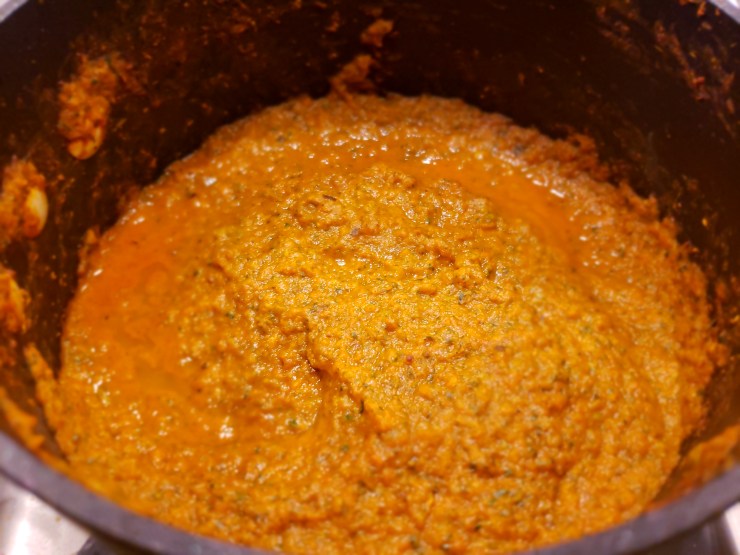
For the rice:

In a nonstick pot, heat up some oil.  Add the cumin and wait till it starts to splutter.  Add the onions and saute till they turn translucent.  Oh boy! The kitchen smelled so good with just the cumin and onions cooking together, I couldn’t wait till it was done so I can just dig in!

20151022_181518

Once the onions are translucent, add in the tomatoes.  Be careful!  Don’t add the tomatoes when the onions are not done cooking.  The acid from the tomatoes prevents the onions from cooking all the way through and this will change the flavor profile.

20151022_181558

Saute the tomatoes for a couple more minutes until they are tender.  Add in the rice and saute for a couple of minutes so it can soak in some of the flavor.  Then add in the veggie broth, salt, and taco seasoning.  Mix well and let it cook for about 20 minutes until the rice is tender.  Turn off the heat and cover the pot.  This is key whenever I make any type of rice – letting the rice sit in its own steam for 5 minutes.  This ensures the rice is nice and fluffy and makes it taste so much better!

20151022_184116

For the Veggie Stuffing:

Heat some oil in a nonstick pan.  Add the onions and garlic and saute for a couple of minutes. Add in the yellow squash and zucchini and continue to saute for another 5 minutes.  Add in the black beans, salt, fajita seasoning, cayenne pepper and cumin powder.  Mix well and cook for another 2-3 minutes.

20151022_184133

To assemble the peppers:

Preheat oven to 375°.  Spray some cooking spray on a cookie sheet and line the peppers.  Spoon some rice into the peppers, followed by the veggies and repeat till you reach the top.  Sprinkle some cheese on the top and bake in the oven for about 15 minutes or until the peppers are tender.  Serve hot and enjoy!
I’ve included the full recipe below.  I hope you like it just as much as we did.

20151022_184616

For the rice:
1/2c rice
1c low sodium veggie broth
1tsp onions
1/2c finely diced onions
1/2c chopped tomatoes
1Tbsp taco seasoning
1Tbsp Olive Oil
salt to taste

In a nonstick pot, heat up some oil.  Add the cumin and wait till it starts to splutter.  Add the onions and saute till they turn translucent.  Once the onions are translucent, add in the tomatoes.  Saute the tomatoes for a couple more minutes until they are tender.  Add in the rice and saute for a couple of minutes so it can soak in some of the flavor.  Then add in the veggie broth, salt, and taco seasoning.  Mix well and let it cook for about 20 minutes until the rice is tender.  Turn off the heat and cover the pot.

For the Veggie Stuffing:
1/2c diced zucchini
1/2c diced yellow squash
1/2c finely diced onions
1 14oz can black beans, rinsed and drained
2 cloves garlic, minced
1Tbsp Olive Oil
1Tbsp Fajita Seasoning
1tsp cayenne pepper
1tsp cumin powder
salt to taste

Heat some oil in a nonstick pan.  Add the onions and garlic and saute for a couple of minutes. Add in the yellow squash and zucchini and continue to saute for another 5 minutes.  Add in the black beans, salt, fajita seasoning, cayenne pepper and cumin powder.  Mix well and cook for another 2-3 minutes.

To assemble the peppers:
2 bell peppers, halved, deseeded
1cup shredded cheese

Preheat oven to 375°.  Spray some cooking spray on a cookie sheet and line the peppers.  Spoon some rice into the peppers, followed by the veggies and repeat till you reach the top.  Sprinkle some cheese on the top and bake in the oven for about 15 minutes or until the peppers are tender.  Serve hot and enjoy!

Basil Butternut Squash Lasagna

20151002_195403

Fall is here and that means squash is everywhere.  So many different kinds but butternut squash is one of my favorites.  I experimented with Giada de Laurentiis’ recipe for Butternut Squash Lasagna and since then, I’ve made a few changes of my own.  This recipe is great to serve for a dinner party, or even to have for lunch leftovers.  If you want the original recipe, I’ll post a link at the end of this blog post.  But for the moment, here’s my version.

Ingredients:
1Tbsp olive oil
1 whole butternut squash, peeled, seeded, and cut into 1-inch cubes
Salt and freshly ground black pepper
1/2c water
1/4c butter
1/4c all-purpose flour
3 1/2c low-fat milk
Pinch nutmeg
3/4c (tightly packed) fresh basil leaves
1c fresh basil leaves, chopped
12 no-boil lasagna noodles
2 1/2c shredded low-fat mozzarella cheese

Directions:

Add the squash in a heavy large pot full of boiling water.  Cover and simmer over medium heat until the squash is tender – it’ll take about 20-30 minutes.  Spoon out the squash and let it cool for 5 minutes.  Add to food processor and blend until smooth.  Season with salt and pepper to taste.

Melt the butter in a heavy medium-size saucepan over medium heat. Add the flour and whisk for 1 minute. Gradually whisk in the milk. Bring to a boil over medium-high heat. Reduce the heat and simmer until the sauce thickens slightly, whisking often, about 5 minutes.  Add the nutmeg and mix well.  Cool slightly. Transfer half of the sauce to a blender. Add the 3/4 of the basil and blend until smooth. Return the basil sauce to the sauce in the pan and stir to blend. Season the sauce with salt and pepper, to taste.

Preheat to 375 degrees F.  Spread a ladle of the sauce in a baking dish. Arrange 3 lasagna noodles on the bottom of the pan. Spread a little squash puree over the noodles. Sprinkle with mozzarella cheese. Drizzle some more sauce over the noodles.  In the second layer, sprinkle the cup of chopped basil.  Continue layering and top with mozarella cheese.

20151002_192341Tightly cover the baking dish with foil and refrigerate for at least 1 hour.  I found that this makes the sauce not bubble over and the flavors are so much more vibrant.  Bake the lasagna for 40 minutes.  Let the lasagna stand for 15 minutes before serving.  Garnish with some fresh basil.

*Here is the link to the original recipe by Giada de Laurentiis: Butternut Squash Lasagna