Crispy Chickpeas and Sweet Potato Tacos Yum

When I first started experimenting with this recipe, I wasn’t sure how the sweet potato was going to work in my tacos.  I debated constantly trying to pair a different vegetable, but ultimately, I kept coming back to the sweet potatoes. Continue reading “Crispy Chickpeas and Sweet Potato Tacos Yum

Veggie Pasta Sauce Yum

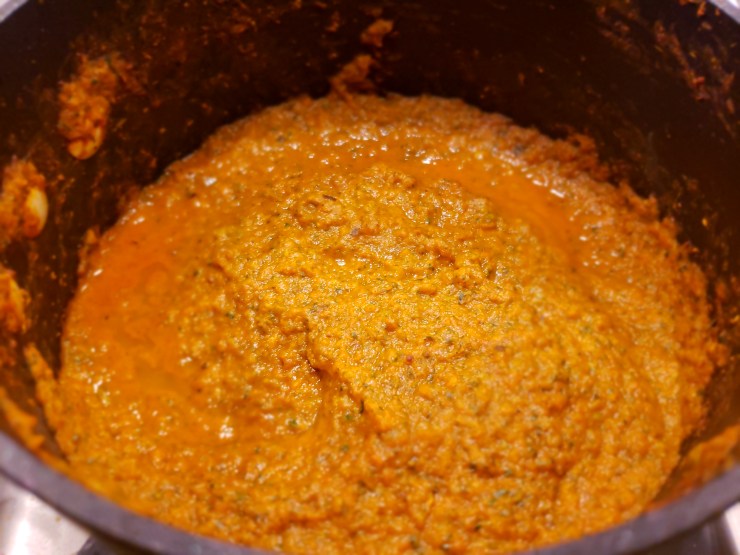
When my kids were younger, I had a bit of a hard time getting them to eat certain vegetables.  Even today, my oldest will not eat any type of leafy green because it’s a “salad” and she doesn’t eat salads apparently.  My youngest pretty much copies her Sissy and does whatever she says.  Sanaya loves spinach….. if it’s cooked down into a saag, blended into her Popeye muffins or hidden in this veggie sauce.
20180803_172940.jpg
This recipe came into being when Aishani was new to eating foods at about almost 1 year old.  Sanaya used to love pasta and Aishani liked it because she was all about finger foods and rotini was big enough for her to hold in her cute little pudgy hands.  Added benefit, I can make a batch, freeze it for future use on a last minute day.
20180803_170102.jpg
I load this pasta sauce up with onions, carrots, bell peppers, spinach, and frozen mixed veggies.  I also add tons of spices including turmeric, especially in the winter which is rich in it’s anti-inflammatory properties.  It’s such a healthy pasta sauce and my wonderful kids don’t even notice further than it being a red pasta sauce.  Try it out…. trick your kids or even spouse and see if they notice the difference!
20180803_172931.jpg

20180803_174235.jpg
From my kitchen to yours, Enjoy!

Ingredients:
1 med onion, chopped finely
1 bell pepper, chopped finely
1 carrot, chopped finely
¼ c frozen mixed veggies
¼ c spinach
3 cloves garlic, minced
1 jar (about 1½ pounds) your favorite pasta sauce
¼ tsp ajwain (carom seeds)
¼ tsp haldi (turmeric)
½ tsp lal mirch (cayenne pepper)
¾ tsp cumin powder
1 tsp coriander powder
2 tsp Italian seasoning
1 Tbsp Avocado (or Olive) Oil
salt to taste
pepper to taste

Directions:
In a deep pot, heat oil on medium flame.  Add in the carom seeds.  When they splutter, add in the onions and sauté until translucent, about 3-5 minutes.  Add in garlic and sauté for another 30 seconds.  Add in the turmeric, and let it bloom for about 30 seconds.
Once the turmeric has mixed in well, add in all the veggies except the spinach, spices, salt and pepper.  Mix well and cook for about 10 minutes or until they are tender.  Finally add in the spinach and sauce and cook for 2 minutes stirring constantly.
Turn the flame off and with a hand blender, blend the veggies into the sauce.  You should get a chunky consistency though if you prefer a more smooth texture, you can blend in a blender.  If it’s too thick, add 1 Tbsp of water at a time until you achieve your desired consistency.
Taste and adjust for salt.

Serve with your favorite pasta!

Instant Pot Chole Yum

Growing up, one of my favorite North Indian dishes has always been Chole.  Whether we were eating at a wedding, an Indian restaurant, or requesting it as my special birthday dinner, Chole has always been a constant and a comfort in my life.  The aroma of it freshly made in the air, just pulls at you.
wp-1583865934648.jpg
There are so many different versions of making this recipe based on where in North India you are.  Sometimes, even in the same region, recipes differ vastly from home to home.  I prefer mine to have a thick red gravy, which is best achieved I’ve found by adding an abundance of tomatoes (and I really mean A LOT)  and spices.  The best part is that this dish is such a classic, you can never go wrong.  Serve it hot with rice, naan or Bhatura and be prepared to be wowed!
wp-1583865934527.jpg
From my Kitchen to yours, I really hope you enjoy this.

Ingredients:
1 c dried chickpeas, washed and soaked overnight (at least 4 hours)
1 ½ c water
1 Tbsp Olive or Avocado Oil
5 cloves garlic, minced
1″ ginger, grated
1 large yellow onion, finely chopped
3 med-large tomatoes, finely chopped
1 ¾ c tomato sauce
2 tsp cayenne pepper (or to taste)
2 tsp coriander powder
1 Tbsp Chole Masala
1 tsp aamchur (dry mango) powder
1 ½ tsp cumin seeds
2-3 bay leaves
½ tsp peppercorns
1″ cinnamon stick
cilantro to garnish

Directions:
1. Start the instant pot on sauté mode.  Add oil and let it heat up.
2. Add cumin seeds and let them splutter.  Add in the cinnamon stick, peppercorns and bay leaf.  Sauté for 30 seconds.
3. Add ginger and garlic and sauté for another 30 seconds.
4. Add in the onions and sauté for 3-5 minutes until they turn translucent and start shrinking.
5. Add in the tomatoes, cayenne pepper, coriander powder, chole masala, and salt.  Cook for 2-3 minutes until the tomatoes start softening.  Add in the tomato sauce and cook for another 2-3 minutes.
6. Drain the water from the chickpeas and add them to the instant pot.  Mix well with the gravy and cook for 2-3 minutes.
7. Add in the water and mix well.  Turn off the instant pot, cover with vent to sealing position and change setting to manual/pressure cook for 40 minutes.
8.  When the instant pot beeps, do a 20 minute NPR (natural pressure release).  If the pin has not dropped at this point, release the pressure and open the instant pot.
9.  Change setting to sauté, add in the aamchur powder and let boil for 3-5 minutes.  Taste and adjust for salt.
10. Garnish with fresh cilantro and serve hot with rice, naan or bhature.

Enjoy!

Avocado Roti Yum

My youngest is in love with Roti.  Give her roti and yogurt and she will happily eat it all day.  Unfortunately, there’s not much nutrition in plain rotis (well, some fiber I suppose and lots of carbs.  And they do taste really good.  So I’ve been coming up with ways to make roti that will satisfy her roti cravings as well as make me happy that I’m feeding her something nutritious.
20190904_160932.jpg
These avocado rotis are one of my better creations I think.  The girls loved the green color of the roti, there was just a hint of avocado in it without overpowering it, and even if the girls didn’t eat any sabzi (veggies) on the side, at least they were still getting some in their roti.
20190904_160941.jpg
Wait….avocado is a fruit – what veggies are you talking about? Yes it is, but there’s a secret ingredient in here that no one suspected.  Drumroll please……..
Spinach! Yep, not even my husband figured out there was spinach in these rotis.  I actually had been struggling with this recipe for a while because I had the flavor profile down but they wouldn’t stay green once I added the flour to the avocados and a certain ratio was necessary otherwise, it would change the essence of the roti.  I happened to also be making spinach dal – another favorite of my youngest – and thought, why not add some spinach to the roti dough.   Worth a shot.  And what a shot let me tell you.  It gave the green color I was looking for, added some extra fiber and calcium.  Like I said, win-win!
20190904_173902.jpg
20190904_174535.jpg
Try it and tell me what you think!

From my kitchen to yours, I really hope you enjoy this one.

Top 20 Brown Rice and Quinoa List!

The other day, I opened up my blog to type up a recipe and I got a notification.  Most of my notifications are the usual responses to my recipes but this one was different.  I had to read it a couple of times to make sure I was reading it correctly.  Rebecca, from www.simplerecipeideas.com, had compiled a top 20 list of the best Brown Rice and Quinoa recipes and mine made the list! I was honored that my Quinoa, Brown Rice and Black Beans was chosen for her top 20 and thank you Rebecca for including me and mine in your list!

When I came up with this recipe, I was had just discovered the Seeds of Change Brown Rice and Quinoa pouches.  They are so delicious, I could finish a whole pouch in one go (which could usually be enough for 2 servings!).  To make myself feel a little less guilty, I decided to add some veggies and beans, give it a southwest-ish flavor profile, and voila!  I ended up making a delicious meal out of the pouch!  It’s great because this is a 10 minute meal recipe, or a great side dish.  Check it out at the link above and tell me what you think!

Barley Bowl

We’ve recently started eating more barley during meal times and use it as a go to for most of the week.  When I’m cooking the barley, the aroma that wafts out just makes your mouth water.  Then you bite into the nutty flavor and it’s a home run for me.   Plus, it’s really healthy so I don’t feel guilty about eating a little extra (as I tend to do).  It’s high in dietary fiber, a good source of protein, it’s low in sodium, and is a really good grain to eat if you’re trying to lose weight.
20190408_154956.jpg
This recipe was born of out sheer laziness.  Nope.  Not kidding.  I had been running errands all day, doing what seems like an indefinite load of laundry for the girls, and just wasn’t in the mood to cook (a rare moment).
20190408_155218.jpgSo, I started to putter around the kitchen feeling guilty about what to serve the family for dinner, feeling guilty that I wanted to pull something from the freezer, then unsatisfied with everything that I had because maybe, deep down, I knew I would figure something out.
20190408_155252.jpg
I’ve also been obsessed with sweet potatoes lately.  I’m not sure why… maybe it’s a slow developing discovery that I love them whether steamed, roasted or bbq’d?  Anyways, of course then I decided I wanted to put the sweet potatoes and the barley together.
20190408_184942.jpg
I figured on adding avocado because, who doesn’t add avocado to everything?  But I was still missing one more thing.  As I was getting started prepping, it hit me.  Caramelized Onions!  I discovered the joy of eating these a couple of Thanksgivings ago, and I keep wondering, what was I doing with my life?! Of course, since I was trying to keep this to a healthy dish, I used EVOO but it does taste so heavenly with butter.  If you want to use butter, just swap out the EVOO for equal measurement of butter.
20190408_184844.jpg
Little by little, I started putting this bowl together without having a real sense of direction and now, my husband wants it in the rotation weekly!  Score for me!
I added a chimichurri dressing to this to give it a little pizzazz and some chia seeds at the end (originially for presentation but, hey! the added Omega 3, fiber, and protein helps).
Check out the recipe below, try it out and let me know what you think!

Ingredients:

1 med red onion, diced
2-3 garlic cloves, minced
2-3 sprigs Rosemary
1 c pearl barley
4 c veggie broth (optional, 2 c broth & 2 c white wine)
1 large sweet potato, 1″ cubes
1 lg yellow onion, ½” slices
1 lg avocado, cubed
1 Tbsp Chia seeds
2 tsp paprika
salt to taste
pepper to taste
3 Tbsp EVOO

For the Chimichurri:
1 bunch cilantro
2 garlic cloves
2 Tbsp red wine vinegar
1 Tbsp lime juice
3 Tbsp EVOO
1 tsp paprika
1 tsp dried red chili flakes
Salt to taste
pepper to taste
1 serrano pepper (optional for more heat)

Directions:
Preheat oven to 425ºF .  Place sweet potato on baking sheet, add 1 Tbsp EVOO, salt, pepper and paprika.  Mix well and bake for 25 minutes.
In a shallow pot, heat 1 Tbsp EVOO.  Add onions and cook until they are browned.  Add in the barley and cook until it’s golden red in color.  Add in the garlic, rosemary, broth, salt and pepper.  Mix well and bring to a boil.  Once it reaches a boil, cover and cook on medium heat for 20-25 minutes.  Turn off the heat and pick out the rosemary stems.
While the barley is cooking, in another pan, heat 1 Tbsp EVOO and add the yellow onions.  add some salt to taste and mix well.  Cover and cook for 20 minutes, while mixing the onions around every 5 minutes.
For the chimichurri, put all the ingredients in a small food processor or blender and blen everything until it becomes a smooth dressing.

For assembly:
Line a wide bowl with a cup of the cooked barley.  Add in the sweet potatoes, caramelized onions, avocado, and chimichurri.  Sprinkle some chia seeds on top and enjoy!

Roasted Garden Salad

I don’t like to labor over big meals during the summer time – I’d rather spend my time outdoors!  To me, summertime is all about simple but filling foods and clean eating so I can enjoy the sun as much as possible.
This salad is just that.  It’s refreshingly light, satisfying, healthy, easy, and best of all, I can do it within 20 minutes!

20180709_185915.jpg

It truly is a one pan deal – all you have to do is line all the veggies in the pan, roast them in the oven and voila!
20180709_190720.jpg
I added in some roasted chickpeas for crunch and protein… let me tell you this completed the salad in the best way possible.
20180709_191223.jpg

Ingredients:
1lb fresh arugula
1 Bell Pepper
1 Onion
1 Zucchini
1 Yellow Squash
1 14oz can of Garbanzo beans, drained and rinsed
1 Tbsp Italian Seasoning
2 tsp smoked paprika
2 tsp Balsamic Vinegar
Salt to taste
Pepper to taste

Directions:
Heat oven to 350ºF.  Sliced all veggies and line in a baking sheet.  Drizzle with EVOO, add salt, pepper and Italian seasoning.  Mix well so all the veggies are equally seasoned.

Meanwhile, in another tray, spread out garbanzo beans in a flat layer.  Drizzle with EVOO, add salt and pepper and toss to coat evenly.  Sprinkle paprika on the top but don’t mix it.

Bake veggies for 20 minutes and beans for 20-25 minutes.  In a bowl, add arugula.  when veggies and beans are done, add them to the arugula.  Drizzle EVOO lightly, add balsamic vinegar, salt and pepper and toss.  Enjoy this salad as much as I do!

Pasta Salad

A while back, my aunt and her family came over for dinner and she brought this pasta salad. I never was a big pasta salad person because they usually have too much mayo, not enough flavor, and are just too uninspiring for me.

20180703_154501

So I tried her pasta salad because I didn’t want to be rude. I should’ve known. My aunt is a pretty amazing cook and I don’t know why I ever doubted her abilities with even a pasta salad. Ever since I’ve started making this salad, I’ve had to remind myself I can’t eat it for every meal …. or can I? It’s just so delicious, healthy, and fresh!

20180703_135535

There’s crunch from the bell peppers, sweet from the juicy, plump raisins which take in all the juices of the dressing, and a hint of spice from the cayenne.

20180703_154443

I’ve altered it slightly, but like my aunt says, there is no wrong way to make this – it’s that easy and delicious!
One of the changes I made is adding pan roasted corn seasoned with paprika. This makes for a delicious side for any meal, and a great addition to this pasta salad.

20180703_141157

I changed up the dressing ratio slightly too. I added a little more yogurt to the mix as it makes the raisins more plump.

20180703_160203

This recipe is great for big gatherings, potlucks and summer BBQ parties. I tend to make it the day before because as it sits in the fridge cooling, the dressing saturates into the pasta emphasizing all the spices in every bite you take.

From my kitchen to yours, I hope you enjoy this salad as much as I do. Try it out and let me know!

Ingredients:
1 lb package of rotini pasta
1 orange bell pepper, diced
1 red bell pepper, diced
1 14oz can of black olives, drained, rinsed and sliced
1 14oz can of garbanzo beans, drained and rinsed
1 14oz can of kidney beans, drained and rinsed
3/4 cup raisins
1 ½c corn
2 tsp salt
1 tsp black pepper
3 tsp cayenne pepper
1 Tbsp EVOO

For the dressing:
2 ½c yogurt
1 c light mayo
1 package Italian seasoning

Directions:
Cook pasta per package instructions.
While you’re boiling your pasta, dice up the bell peppers, cucumbers, slice up the olives, and drain/rinse the beans.
On the side, heat up the oil and add in the corn. Sauté for about 5-7 minutes, then add in the salt, pepper and paprika. Mix well, turn off the stove and let cool to room temp.
Once the pasta is cooked, drain and rinse with cold water.
In a large mixing bowl, combine the pasta, all the veggies, the beans, the cooked corn, and raisins.
In a small mixing bowl, combine the yogurt, mayo, cayenne pepper and Italian seasoning. Whip it until the dressing is a creamy consistency; add it in with the pasta and veggies and mix well. Taste and adjust salt and pepper per your flavor profile.
Refrigerate at least 3 hours or overnight. Serve cold.

Zucchini Corn Cakes on a bed of Grilled Peach and Pineapple Salsa

Phew! That’s a long name for sure.  And the name lives up to the punch that it packs!  We had a BBQ on the 4th and had plenty of food leftover.  I definitely didn’t want to eat the same stuff for the next few days so I figured, this is when I need to get creative and upcycle it. Continue reading “Zucchini Corn Cakes on a bed of Grilled Peach and Pineapple Salsa”

Almond Coconut Porridge

Breakfast is my favorite meal. There are so many fun foods to eat and start your day. Sweet or savory, light or hearty, healthy or greasy!

A couple of months ago, a friend recommended a local restaurant, Homegrown. The moment I walked in and saw their menu, I fell in love. They’re a casual place that serves food which is organic and from local farmers. Talk about tasting the freshness in my food!

I ordered their Coconut Chia Porridge. Was I blown away! The creamy porridge paired with the crunchy toasted coconut and almonds, topped with sweet banana slices. I was in breakfast heaven!

Since then, I’ve been obsessed. Especially over the last week. I just can’t get it out of my mind so I decided to try my hand at it and make my own version.

20180315_142907.jpg

In addition to chia seeds, I added flax seeds. A double dose of fiber and omega 3’s (which is a win-win when you’re feeding two toddlers)!

20180315_082228.jpg

If you don’t have time in the morning because you need to rush out of the house, then this is a very easy prepare the night before recipe. Just mix all the ingredients for the oats, cover and keep in the refrigerator. Heat it up the next morning and add your toppings.

20180315_083655.jpg

Here is what I added to mine: toasted coconut, walnuts, craisins, sesame seeds and fresh blueberries. Not the same as Homegrown obviously but still delicious!

20180315_083632.jpg

Try it out!

Ingredients:
1c Steel Cut Oats
2c Unsweeteened Coconut Almond Milk (or any milk of your choice)
1c Water
1tsp Salt
1Tbsp Ground Flax Seed
1Tbsp Chia Seeds

For Toppings:
1Tbsp shredded coconut, toasted
Handful of toasted walnuts
2tsp Craisins
Handful of fresh blueberries
½tsp sesame seeds
1Tbsp Almond milk (or more for your desired consistency)

In a medium saucepan, combine the almond milk and water and boil. Once it reaches a boil, reduce heat and add in the oatmeal and salt. Stir occasionally as the oats cook, approximately 20 minutes. As the oats start to thicken, about 10 minutes into cooking them, add in the chia and flax seeds. Mix well and continue to cook until the oats are done.

Spoon into a bowl and add the toppings.

I hope you and your family enjoy this bowl of porridge as much as me and mine did!

Polenta & Veggie Pot Pie

I love rainy days!  All I want to do is curl up with a blanket in front of the fireplace, read a book with a cup of chai in my hand.  That probably won’t happen till my kids are off to school.

In the meantime, I decided to put together a hearty stew that warms you from your fingers to your toes.  I took the stew a little further and decided to put a spin on it.  I made cute pot pies but instead of the traditional pastry shell, I used polenta and cheese for the crust.  It tasted so delicious, the creamy polenta and the melted cheese just got all of us, especially my daughter hooked!

20180226_183825.jpg

I have these cute little Le Creuset cocottes that I got as a gift from our close friends a few years ago and thought my 2.5 year old will get a kick out of eating from it.  And boy was I right!  She insisted on eating her leftovers the next day from these adorable pots!  I was just happy she loved the stew as much as the cocottes!

20180226_184128.jpg

I hope these warm you up on a cold rainy (or snowy) day like it did us!

Ingredients:
½ onion, chopped finely
1c cubed butternut squash
1 jalapeño, seeded and chopped
2 cloves garlic, minced
1 14.5oz can black beans, drained and rinsed
¼c AP flour
2Tbsp tomato paste
2Tbsp cayenne pepper
1tsp smoked paprika
1tsp cumin powder
¼tsp oregano
½tsp salt (or to taste)
¼tsp ground black pepper
2c veggie broth
1Tbsp Sriracha sauce
¼c milk
2Tbsp EVOO

For the Polenta:
2c Veggie Broth
2c milk
1c Polenta
¼tsp salt
¼tsp pepper
3Tbsp Butter
3oz sharp cheddar cheese, shredded

Directions:
Preheat oven to 400ºF.

In a nonstick pan, over medium heat, add EVOO.  Once the oil is heated, add onions and sauté for a couple of minutes.  Add garlic and cook for another 30 seconds.  Now add the butternut squash and for about 10 minutes or until it becomes tender.  Make sure you don’t over cook it as the squash can get a mushy texture.  Add in all the dry spices and mix well.  Cook with the spices for a 1-2 minutes so they bloom and flavor the squash.  Now, sprinkle in the flour.  Stir for about 3 minutes so the flour cooks.  If the flour doesn’t cook through, you’ll be able to taste a raw, gritty flavor which is so unappetizing.  Add the veggie broth, tomato paste, and Sriracha, raise to a simmer and cook until it has thickened.  Once it has thickened, add in the milk and black beans.  Cook for another 5 minutes.  Taste and adjust for salt.

Spoon the mixture into 4 individual baking dishes or one pie pan and place on a baking sheet with a 2 inch lip.

For the polenta, add the veggie broth and milk in a saucepan and bring to a boil.  Lower the heat and whisk in the polenta slowly.  If you add it all at once, the polenta will be lumpy and not cook through.  Keep stirring until the polenta thickens, approximately 10-12 minutes.  Add in the butter and season with salt and pepper.  Spoon the polenta over the pot pie filling and top with cheese.

Bake in the oven for about 18-20 minutes or until the polenta is golden brown and the cheese is melted.
Remove from oven, garnish with fresh parsley and let it warm you to your toes as you dig in to this deliciousness!

20180226_184130.jpg

Spicy Garlic Hummus

I love snacking.  Who doesn’t?!  Hummus is one of my favorite foods.  Since the first time I tried it in college, I was in love.  Recently, S (my 2 year old) has also been snacking on hummus.  And my hubs too.  This is just one of those foods where I like to add it to everything.  A great snack for S with some carrots and broccoli, or on a sandwich for my hubby, or in a wrap for me.  The versatility of hummus is amazing.
Most hummus recipes have a key ingredient – tahini, which is a paste made of sesame seeds.  Well, I didn’t have any around but I was craving hummus so here is my versions of tahini free hummus.  Hope you enjoy it!

20180225_113458.jpg
That’s my little helper.  She loves helping me cook in the kitchen and makes me so proud!
Drain the garbanzo beans and reserve the liquid – you’ll be using it later.  I used canned beans but you can use dried beans and soak them and cook them.  If you do, reserve the water that you cooked it in.  It’ll be used later.
20180225_113503.jpg
In a blender, combine the garbanzo beans, garlic, salt, pepper, Sriracha, lemon juice, half of the reserved liquid and olive oil.
20180225_114521.jpg
I just love Sriracha!  The kick it adds at the end of each bite when you eat this hummus is the perfect touch!
20180225_115849.jpg
Blend it so it becomes a good chunky paste.  This picture is deceiving – it really is chunky!
20180225_141413.jpg
Serve it with your favorite veggies!  S’s current fave is carrots as she gets a kick out of dipping them in her hummus.  Hope you enjoyed this as much as our family did!

Ingredients:
1 ½ cans garbanzo beans, drained
½c liquid reserved from the garbanzo beans
juice squeezed from 1/2 lemon
1 Tbsp Sriracha sauce
4 cloves garlic
3 Tbsp EVOO
Salt to taste
Pepper to taste

Directions:
Combine all the ingredients in a blender and grind into a chunky paste.  Serve with your favorite veggies and crackers.  Enjoy!

Palak Paneer

Palak paneer is one of my husband’s favorite dishes, and recently becoming one of my daughter’s favorite dishes too.  This is a win-win recipe for me because it’s full of iron. calcium, protein, and fiber.  The fact that my toddler will gobble it up…. score for Mom!
Here’s my quick and easy version.  Hope you enjoy it!

20180214_132107.jpg
Blanching spinach is pretty easy (though I have to admit, I was intimidated the first time I heard of the process).  Simply dunk the spinach leaves in boiling water for about 3 minutes and using a slotted spoon (so there’s not much excess hot water tagging along with the spinach), pull out the spinach and again dunk them in a bowl of ice water.  This blanching process cooks the spinach without wilting it and keeping intact it’s beautiful, vibrant green color.  Pretty cool, huh!

20180214_133957.jpg
Tomatoes and onions are part of most Indian dishes. I love using this duo to test out various spice combinations for new or upgraded recipes!

20180214_134402.jpg

Ingredients:
For the Spinach Puree:
9 oz fresh spinach
1-2 green chilies (depending on your spice level)
3 garlic cloves
½” ginger knob
3c boiling water

For the Gravy:
1 small onion, finely chopped
1 small tomato, finely chopped
4 cloves garlic, minced
½tsp cumin seeds
¼tsp turmeric powder
½tsp cayenne pepper
½tsp garam masala
pinch of hing
1 bay leaf
7oz paneer, cubed
1Tbsp EVOO
Salt to taste

Directions:
For the Spinach Pureé:
Blanch the spinach and make sure to drain it of any excess water.  Add it to the blender with garlic cloves, ginger, and green chilies.  Blend to a smooth puree and set aside.

For the gravy:
In a nonstick pot, heat oil and add cumin seeds.  Once they start to splutter, add the hing (asafoetida) and bay leaf, and sauté for 30 seconds.  Add the onions and sauté until they are lightly golden.  Add in the garlic and cook for 30 seconds.  Make sure you don’t brown the garlic as the aroma and the taste will cook off.  Add the chopped tomatoes and cook until the water starts to separate.  At this point, add in cayenne pepper, garam masala and turmeric and mix well.  Add in the spinach puree and mix well.  Add in the salt and mix well.  Cook for about 8-10 minutes to make sure the spinach is cooked, and the gravy thickens.  Add in the paneer and mix well.  Cook for 2 minutes so the paneer cubes can become softer.

Serve hot with Naan or Rice.  Enjoy!

Teriyaki Salmon

Recently, we’ve been eating a rotation of mostly the same foods as at least 50% of our household has been taking shifts getting sick.  Well, I’m happy to say, we’re (hopefully) finally getting to the tail end of it so that means no more soup or tea!  My hubby recently picked up some Udon noodles for me (he knows I like them a lot!) and I’ve been trying to figure out what I want to do with them.  Sure they taste great on their own but let’s get real, they taste even better paired with a delicious filet of salmon.
I’ve also been playing around with my version of a teriyaki sauce.  Most of the recipes I found online included a sake but since I was going to experiment on my toddlers as well as my hubby, I decided to leave that one out.  I have to say, this sauce turned out pretty delicious – I even dipped my brussels sprouts in the leftover as if it were a dipping sauce.  Try it out and tell me what you think!

20180212_172550.jpg20180212_172922.jpgThe best part about this sauce is that it is very simple and most people have these ingredients at home!   In a little mixing bowl, add the soy sauce, brown sugar, ground ginger, and minced garlic.  I also added a little flour, some chili pepper flakes and EVOO to the bowl.
20180212_205843.jpg
This is my favorite part of the recipe – sesame seeds.  The nutty flavor and crunch adds just the right note of balance.
20180212_210113.jpg
Whisk everything really well.  You want all the ingredients to blend well and make sure there are no lumps from the flour added.  They won’t cook and trust me – it can ruin the taste.
In a large bowl, line 2 6oz salmon filets and cover with the teriyaki sauce.  Let it marinate for at least 30 minutes.
20180212_175912.jpg
Coat the bottom of a cast iron skillet with EVOO and heat on high until it starts to smoke.  Reduce the heat and place the salmon skin side up and let it cook for 4 minutes.  Do Not Touch the salmon for the next 4 minutes.  I know people get anxious and want to check if it is cooking properly, is it burned, there’s a char type smell coming, etc, etc.  I assure you nothing is wrong with it.  In fact, the more you try to check it, the more it will not cook properly.
Once your 4 minute timer goes off, flip the salmon the other side and cook for another 3 minutes.
Serve with noodles or rice and enjoy!

Teriyaki Salmon:
Ingredients:
2Tbsp Soy Sauce
1Tbsp Brown Sugar
3 cloves minced garlic
1/4tsp ground ginger
1/2tsp chili flakes
1Tbsp sesame seeds
1/2Tbsp flour
2tsp EVOO

2 6oz Salmon filets (can be replaced with tofu or any of your favorite veggies)

Directions:
In a small mixing bowl, add all of the ingredients and whisk to combine everything.
Coat a cast iron skillet with EVOO and heat on high over the stove.  When it starts smoking, add salmon skin side up and cook for 4 minutes.
Flip and cook another 3 minutes.

Serve hot with noodles or rice.
Enjoy!

A “Date” with Granola

This recipe has a couple of stories behind it.  The most simplest, my toddler was having issues and I need to find a way for fiber to be in her diet and her to like it! The second story is a bit cuter.
We had been invited for breakfast and a playdate with one of her dearest friends, E.  Her parents had laid out a delicious breakfast for us and part of it was Granola.  I know you’re thinking, this is nice, but cute?  Mmmmmm…… well let me tell you.  E calls granola Crunch Crunch.  My toddler, (like most toddlers), is a monkey see monkey do.  She ate quite a bit that day and a couple weeks later, when I ran into a dilemma of how to incorporate more fiber, I had just the perfect solution.  Yep, her new favorite word – crunch crunch!
Dates is my new fave thing.  I like to snack on that and nuts throughout the day so I don’t eat enough chocolate to get a tummy ache.  Plus, it is loaded with fiber so I knew I needed to include this in my recipe.  The rest, well, was trial and error.  This is a very simple recipe.  Try it!
No seriously, try it! Our house eats it alone, with milk, yogurt, in any form basically because it is that good!
20180210_092658.jpg
Chop up some dates

Add in the oats, walnuts, and coconut.  (if you eat a bit of your ingredients along the way – don’t worry! I won’t tell because I’m doing the same!)

20180210_095046.jpg
Add the salt, vanilla extract, and olive oil and mix well.  Finally, add in the honey and mix really well.  You want the honey to mix evenly so all the ingredients combine.
Be careful! I got greedy the first time and added too much honey.  I definitely regretted that decision!

20180210_095740.jpg
Line a 2inch baking sheet with a silicone mat and spread the granola evenly.  Bake for 15 minutes at 350F.

20180210_104949.jpg
Look at how beautifully golden that looks!
Let it cool for about 5 minutes then gently scoop it into an airtight container.  Or, if you are impatient like me, just eat it as soon as it cools and make excuses about tasting it!

I’m hoping my “Crunch Crunch” recipe will join you for breakfast soon!

Here’s the full recipe:

Date Granola

Ingredients:
2c chopped dates
3c Old Fashioned Oats
1c shredded coconut
1c chopped walnuts
2Tbsp honey
3tsp vanilla extract
3/4tsp salt
3/4c EVOO

Directions:
Preheat oven to 350ºF.  Line a 2inch baking sheet with a silicone mat.

In a bowl, combine dates, oats, coconut, and walnuts.  Add in vanilla extract, salt and EVOO.  Mix well.  Add in honey and mix until honey combines with granola.

Spread evenly into baking sheet and bake for 15 minutes.

When it’s golden brown, pull out of the oven and cool for 5 minutes before serving.  Store in an airtight container for future use.

Enjoy!

Grilled Avocado and Peach Salad

Summer is here which means so many things in my household.  Getting the grill out for bbq’s, eating all the fun fresh summery foods, and trying to eat healthy to get in shape for a beach body (this is always a struggle!).  Typically in the past, the hubby and I have done standard bbq’s – burgers, corn, potato salads, chips and dip, etc. etc. etc.  This year, we have been inspired to grill almost everything we eat.
One of my husband’s favorites is Peaches.  So I of course go out to Costco and buy a whole case (or 2) then realize, how are we going to eat so many?!  Well, I promised him we would grill some since he fell in love with the idea of it last year.  I also love avocado and have recently seen them grilled in my dishes in restaurants.  Hey, why not add it in?  If anything, it’s a good source of protein and adds a little meatiness to the plate.
Summer also means that I can harvest some of the vegetables, herbs and fruit in my garden.  I am so excited about my garden that I literally watch it like a hawk every single day and get so happy over the tiniest fruit growing.  Well, we have an abundance of arugula growing as well as Basil.  Oh how I love the peppery smell and taste of both of these leaves!  So delicious especially when they are fresh!  I put Basil leaves in my salad?  Yep.  Don’t get ahead of yourself.  I used the leaves but …. I made a basil vinaigrette to go on my salad.
When I told my husband about all the different components of this salad – he was a little skeptical.  How can so many different flavors work together?  Won’t I overshadow the grilled peaches for which this salad was created in the first place?  I decided to find out.  Am I so glad that I did!   The sweetness of the peaches with the peppery arugula and basil was the most divine combination.

Quarter the peaches and avocados and brush with some EVOO.

Heat up the grill (or griddle) and place all the fruit down on one side.  After a couple of minutes, flip to the other side.  Oh I love those grill marks.  And the peaches smell so delicious, I can’t wait to try them!

To assemble the salad, lay down the arugula first, then add some raw cashews.  For the goat cheese, use a fork to crumble it into the salad and finally, add the grilled fruit.  Then, a drizzle of the basil vinaigrette and you’re ready to enjoy a fun, healthy, summery salad!

Ingredients:
For the Salad:
2 c fresh Arugula
1/3c raw cashews
2oz goat cheese
1 ripe avocado, peeled, pitted and quartered
2 ripe peaches, pitted and quartered
EVOO to brush on the fruit

For the Basil Vinaigrette:
3/4 c fresh basil
1/4c red wine vinegar
1/2c EVOO
2 garlic cloves
salt
freshly ground pepper

For the salad:
Brush fruit with olive oil and set aside.  Heat the grill on high heat.  When it is heated through,  place the fruit side down on one side and keep for 2 minutes.  Flip to the other exposed side of the fruit and grill for an additional 2 minutes.  Remove from heat.  Assemble the salad with the arugula at the bottom, followed by the cashews, the fruit and the goat cheese crumbled in.  Drizzle with Basil Vinaigrette.

In a blender, add all the ingredients for the Vinaigrette and blend to a smooth texture.  Store in an airtight bottle in the fridge.

Enjoy!

Chicken & Rice Soup

Having a toddler who goes to daycare means germs, constant runny noses and lots of cuddles.  As a mom, I also have to think of foods that comfort her, taste good when she’s not feeling well and is something nutritious to help her get better soon.   What better than chicken and rice soup that is quick to make when your 2 year old won’t let you go but packed with protein, vitamin C and fiber.
I used some short cuts that I’ll show you along the way.  I hope you make some and enjoy a bowl of good comfort.

20170605_165121

Boil chicken stock and add a chicken breast to it.  Bring to a boil then reduce heat and let it simmer for 25 minutes.  After 25 minutes, take the chicken breast out and shred.  Set it aside.

Chop some onions and red bell pepper and set aside (did you know that 1 cup of red bell pepper has 3 times the Vit. C that 1 orange has!).

20170605_163756

In a non-stick skillet, melt the butter (maybe not that healthy ….)

20170605_163851

Add flour and mix well.

20170605_163935

Mix the flour and butter well until it turns golden brown.  You’ll be able to smell the golden deliciousness.  It’s very important to let the flour cook through otherwise you’ll have a grainy flavor that no one really wants to eat.

20170605_164553

Add some turmeric to this.   Did you know turmeric is a great natural healer?  Among other things, it’s an anti-inflammatory plant and strengthens the immune system.  Pretty much what I need for my toddler when she’s not feeling well.

20170605_164714

Add the onions and bell peppers and sauté for a few minutes on high heat.
Add the veggies to the stock pot and stir well.  Add the chicken back to the stock pot also.

20170605_165344

This is my secret!  Ready made rice.  Not only is it rice – it’s brown/red rice, with kale….. and chia seeds!  This is my cheat.  I save time by not making rice on the side but it’s healthy and readily available in most grocery stores.  Add this pouch to the stockpot and stir well.

20170605_185259

Add a small pinch of salt and pepper.  I didn’t add too much seasoning as the chicken stock tends to have a lot of sodium already.   Let the soup simmer for about 8-10 minutes so the flavors mix in well.  Serve hot and enjoy!

Ingredients:
6 cups chicken stock
1 whole chicken breast
2 Tbsp butter
2 Tbsp flour
1  tsp turmeric
1 red bell pepper, chopped
1 medium onion, chopped
1 pouch Seeds of Change Rice
salt & pepper to taste

Directions:
Boil the chicken stock and add a chicken breast to it.  Bring to a boil then reduce heat and let it simmer for 25 minutes.  After 25 minutes, take the chicken breast out and shred.  Set it aside.
In a non-stick skillet, melt the butter and flour to it.  Stir constantly and mix well until the flour is cooked.  Add turmeric to it and mix well to cook.  Add the onions and bell peppers and sauté for 2-3 minutes.  Add the onions and bell peppers to the stock pot and mix.  Also add in the chicken and rice to the stockpot and simmer on medium heat for 8-10 minutes.  Season with salt and pepper.

Serve hot and enjoy!

Roasted Butternut Squash Soup

There have been a series of storms lately with only rain in the forecast.  Days like these always make me yearn for the some warm soup in front of the fireplace.  The fireplace didn’t happen, but here’s how I put my twist of Thai and Indian fusion on Butternut Squash Soup.

wp-1490376371081.jpg

Heat the oven to 375º.  Add butternut squash to a sheet pan and drizzle with EVOO.  Add salt and pepper and toss so that all the cubes are evenly coated.  Bake for 45 minutes.

wp-1490376362204.jpg

The aroma as these are baking in the oven fills my whole house and has me salivating.  The 45 minutes seem so long but these nuggets are so sweet and delicious when they’re done.   Let’s be honest… I definitely dipped into these and a little more than “a couple” were gone!  Luckily, I had enough left to make soup!

wp-1490376348179.jpgIn a pot deep enough to make the soup, sauté onions until they are soft and starting to turn a little translucent.  While the onions are cooking, grate in fresh ginger.

The fresh ginger adds a great zing and I love watching it sizzle as I grate it straight into the pot.

wp-1490376340983.jpg

Next, I added all the spices – this is where the Indian comes in.  Cayenne, Cumin, Coriander, and Turmeric.  Mix it for a couple of minutes so you don’t have an uncooked taste of the spices in your soup.  If you don’t like spicy too much, feel free to cut out the cayenne pepper.

wp-1490376336070.jpg

Finally, add in the roasted butternut squash and mix everything together.  Add the veggie broth, and a little salt and pepper.  You’ll probably want to taste at this point.  Remember, the squash already had salt on it before you roasted it so you’re really adding enough to bring out the flavors of the spices at this point.  Once it boils, add lemon juice, basil and the coconut milk to it (my Thai inspiration).  With an immersion blender, blend everything so you have a nice, smooth texture.

wp-1490376319089.jpg

Let it simmer for an additional 10-15 minutes.  Enjoy with your favorite nostalgic memories.

Ingredients:
1 butternut squash, seeded and cubed
1 med red onion, chopped finely
3 Tbsp grated ginger
1/2 tsp cayenne pepper
2 tsp ground coriander
1 tsp cumin seeds
1/2 tsp turmeric powder
1/4 tsp cinnamon powder
4 c Veggie broth
1/4 c fresh basil, chopped
1 can coconut milk
salt to taste
black pepper to taste

Recipe:
Heat the oven to 375º.  Add butternut squash to a sheet pan and drizzle with EVOO.  Add salt and pepper and toss so that all the cubes are evenly coated.  Bake for 45 minutes.
Heat EVOO in a soup pot on medium heat and add onions.  Add in freshly grated ginger and sauté 5-10 minutes until onions are soft and translucent.  Add in cayenne pepper, coriander powder, cumin seeds, turmeric powder, and cinnamon powder and mix well.  Add the roasted squash, veggie broth and salt and pepper.  Once it boils, add lemon juice, basil and the coconut milk.  With an immersion blender, blend everything so you have a nice, smooth texture.  Let it simmer for an additional 10-15 minutes.  Serve hot.

Zucchini Tacos

I’m addicted to cooking shows.  There.  I said it. I admit it.  I guess it’s not bad considering other things people are addicted to these days.  Every Saturday mornings, you can find me glued in front of the television watching my favorite show, The Kitchen.  I can’t bear to miss a single episode.  A few weeks ago, they had guest chef Nikki Dinki on the show who shared her zucchini tacos recipe and instantly I knew I had to try those.

They are amazing!  Forget eating them as tacos, my DH ate them on its own.  SO DELICIOUS!  I did make a few slight changes to her recipe to adjust for ingredients I had in the kitchen/pantry.  Hope you enjoy them as much as we did!


Ingredients:
4 medium zucchini, shredded
2/3 c shredded Mozarella cheese
2/3 c Italian bread crumbs
2 eggs
1 tsp cayenne powder
1 tsp cumin powder
1/2 tsp salt
1/2 tsp garlic powder
Olive Oil Cooking SprayDirections:
Preheat oven to 450ºF.Place shredded zucchini in microwave safe bowl and heat on high for for about 3 1/2 minutes.  Mix the zucchini around and replace in microwave for another 3 1/2 minutes.  Let it cool then place in a cheesecloth and drain as much of the water out as you can.  The drier it is, the better your batter and taco shells will turn out.

Add the eggs, cheese, bread crumbs, cayenne, cumin, salt and garlic powder.  Mix well into a dough-ish batter.  Line a baking sheet with parchment paper and spray lightly with Olive Oil Cooking Spray.

Make 8 portions in the shape of balls from the batter, the size just a tad smaller than a tennis ball.  Flatten them directly onto the baking sheet into 5″ diameter rounds with your hands.  They shouldn’t be too thick as the inside will not cook properly.  Bake for 15 minutes.  The taco shells should be slightly golden brown.  Once you remove them from the oven, let them cool slightly before adding filling to shells.

Enjoy!

Original recipe by Nikki Dinki

Pomegranate Eggplant

IMG_5081

This is one of my favorite recipes.  It’s such a simple go to; you can wow friends and family, or just make it for dinner when you’re short on time or feel lazy enough to not make something elaborate.  I originally found this recipe in a cookbook by Yotam Ottolenghi.  I’ve since adapted it to suit my palate but regardless of which version you try, I’m sure you’ll love the impact of so many flavors and textures packed in such few ingredients.

Here’s what I did:
Preheat your oven to 400°F.

Chop the eggplant into 2 inch cubes.  Add in dried thyme, rosemary, salt, crushed chili flakes, and olive oil.  Toss it all to mix well.
IMG_5044

Line a baking sheet with some aluminum foil and place the eggplant on there, skin side down.
IMG_5046

Bake for 20-25 minutes, until the eggplant is cooked through.  Make sure it’s not overcooked, otherwise, it gets mushy and definitely does not taste good!

The eggplant should look something like this:
IMG_5072

When you’re ready to serve, plate up some eggplant and drizzle a little tzatziki sauce over it.  Finally, sprinkle some pomegranate seeds and enjoy.

IMG_5080

Ingredients:
1 large eggplant, skin on, chopped in 2″ cubes
1 Tbsp dried thyme
1 Tbsp dried rosemary
1 Tbsp crushed red chili flakes
generous pinch of salt
1 Tbsp EVOO
1/2 c pomegranate seeds

Directions:
Preheat oven to 400°F
In a bowl, mix in the eggplant with the thyme, rosemary, dried chili flakes, salt and olive oil.  Toss well so every piece of the eggplant is covered with all the herbs.
Line a baking sheet with aluminum foil and place the eggplant on there skin side down.
Bake 20-25 minutes until the eggplant is cooked through.
When you’re ready to serve, drizzle with tzatziki sauce  and top off with pomegranate seeds.

If you’re interested in the original recipe by Yotam Ottolenghi, click here.

Veggie Stuffed Peppers

There are many days recently where we end up eating leftovers because well, with a 4 month old who wants all the attention, it’s hard to spend time in the kitchen when her drooly smile beckons you to play.  Today however, the husband became the center of her attention allowing me a few moments to whip up veggie stuffed peppers.  Layered with rice, veggies and definitely cheese – this is one yummy pepper!

There are a couple different parts to it so bear with me.  Here’s how I made it:

For the rice:

In a nonstick pot, heat up some oil.  Add the cumin and wait till it starts to splutter.  Add the onions and saute till they turn translucent.  Oh boy! The kitchen smelled so good with just the cumin and onions cooking together, I couldn’t wait till it was done so I can just dig in!

20151022_181518

Once the onions are translucent, add in the tomatoes.  Be careful!  Don’t add the tomatoes when the onions are not done cooking.  The acid from the tomatoes prevents the onions from cooking all the way through and this will change the flavor profile.

20151022_181558

Saute the tomatoes for a couple more minutes until they are tender.  Add in the rice and saute for a couple of minutes so it can soak in some of the flavor.  Then add in the veggie broth, salt, and taco seasoning.  Mix well and let it cook for about 20 minutes until the rice is tender.  Turn off the heat and cover the pot.  This is key whenever I make any type of rice – letting the rice sit in its own steam for 5 minutes.  This ensures the rice is nice and fluffy and makes it taste so much better!

20151022_184116

For the Veggie Stuffing:

Heat some oil in a nonstick pan.  Add the onions and garlic and saute for a couple of minutes. Add in the yellow squash and zucchini and continue to saute for another 5 minutes.  Add in the black beans, salt, fajita seasoning, cayenne pepper and cumin powder.  Mix well and cook for another 2-3 minutes.

20151022_184133

To assemble the peppers:

Preheat oven to 375°.  Spray some cooking spray on a cookie sheet and line the peppers.  Spoon some rice into the peppers, followed by the veggies and repeat till you reach the top.  Sprinkle some cheese on the top and bake in the oven for about 15 minutes or until the peppers are tender.  Serve hot and enjoy!
I’ve included the full recipe below.  I hope you like it just as much as we did.

20151022_184616

For the rice:
1/2c rice
1c low sodium veggie broth
1tsp onions
1/2c finely diced onions
1/2c chopped tomatoes
1Tbsp taco seasoning
1Tbsp Olive Oil
salt to taste

In a nonstick pot, heat up some oil.  Add the cumin and wait till it starts to splutter.  Add the onions and saute till they turn translucent.  Once the onions are translucent, add in the tomatoes.  Saute the tomatoes for a couple more minutes until they are tender.  Add in the rice and saute for a couple of minutes so it can soak in some of the flavor.  Then add in the veggie broth, salt, and taco seasoning.  Mix well and let it cook for about 20 minutes until the rice is tender.  Turn off the heat and cover the pot.

For the Veggie Stuffing:
1/2c diced zucchini
1/2c diced yellow squash
1/2c finely diced onions
1 14oz can black beans, rinsed and drained
2 cloves garlic, minced
1Tbsp Olive Oil
1Tbsp Fajita Seasoning
1tsp cayenne pepper
1tsp cumin powder
salt to taste

Heat some oil in a nonstick pan.  Add the onions and garlic and saute for a couple of minutes. Add in the yellow squash and zucchini and continue to saute for another 5 minutes.  Add in the black beans, salt, fajita seasoning, cayenne pepper and cumin powder.  Mix well and cook for another 2-3 minutes.

To assemble the peppers:
2 bell peppers, halved, deseeded
1cup shredded cheese

Preheat oven to 375°.  Spray some cooking spray on a cookie sheet and line the peppers.  Spoon some rice into the peppers, followed by the veggies and repeat till you reach the top.  Sprinkle some cheese on the top and bake in the oven for about 15 minutes or until the peppers are tender.  Serve hot and enjoy!

Guacamole

IMG_4518

Whether it’s watching sports, a party we’re hosting, or just snacking while sitting around the table with friends, this Guacamole recipe finds its way into our bellies often.  The husband and I are big avocado lovers and this guac is filled with simple flavors that hit the spot no matter the occasion.  I hope this becomes a favorite in you kitchen too!  Here’s how I made it:

Ingredients:
2 Avocados, peeled and pitted
2 tomatoes, seeded, finely diced
½ onion, finely diced
1 jalapeno, finely diced
3 Tbsp freshly squeezed lemon juice
Salt & Pepper to taste

Directions:

Mash the avocados in a bowl. I like to leave some chunks when mashing as it adds a nice texture. Add in all the ingredients and mix. Don’t over mix, as this will make the avocado pasty. Season with salt and pepper per your taste. Serve with chips, in tacos, or just about anything you want!

Three Bean Chili

*Updated Oct. 16, 2020

Sundays in our house are dedicated to football. Now that the season has started, I’m challenging myself to find some healthier recipes to get us through the games. Sure the chicken wings, nachos, creamy dips, and pizza sound good but they definitely don’t pass the healthy test. This is a hearty chili loaded with veggies, beans and definitely falls into the comfort zone. It makes you want to curl up on the sofa with a warm bowl while you’re watching football (or a movie or your favorite tv show).


The heat of the ancho chili and cayenne give this a perfect balance to some of the sweeter veggies like the carrots and bell peppers.  Using the canned beans also take a lot of the work out of this dish for you and I’ve included both stove top and slow cooker versions so you can make it any way that is easiest and most convenient.

Add a squeeze of lime and a sprinkle of spring onions to finish off this chili before eating with a side of cornbread.  Nothing can beat this delicious chili on a cold winter day.  I’d like to say, I’m definitely ready for this winter season!

I’ve made this chili vegan and it can remain so with toppings such as spring onions, cilantro, avocado and lime wedges.

Optional to add are toppings such as sour cream and cheese.  They will definitely soften up the taste if you choose these!

From my kitchen to yours, I hope this 3 Bean Chili brings a little warmth to your day!

I’ve made this both on the stove top and in the slow cooker.  Here is the equipment I used to make the chili:

Chicken Pot Pie

Updated Jan 4, 2020 from the original post published Sept, 2015.

Chicken pot pie is a family favorite in this household.  My kids have been asking for this almost biweekly for the past couple of months.  It makes me so happy that they would love eating my pot pie (though I secretly think it’s mostly because the name has “pie” in it).  I have included in the recipe notes to make this recipe vegetarian and vegan so try it out and let me know what you think!

A hack that I have been known to use on occasion is buying rotisserie chicken, shredding it up and using that instead of baking my own.  This simply cuts down on the time involved to make the pot pie.  If you choose to go this route, remember to buy an herb roasted or seasoned chicken so that there is added flavor.  You can also make these in individual ramekins to personalize them by adding chicken to those who want it and keeping it vegetarian for those who prefer not.

Making chicken pot pie on a busy weeknight may not be ideal but it you can totally make and assemble the pie over the weekend and simply bake it during any weeknight.  Storage is easy as it can last in the fridge up to 5 days.  So what are you waiting for?  Make this your next meal and feel the comfort of home!

From my kitchen to yours, I hope you enjoy this delicious Chicken Pot Pie!

Here are the tools I used to make this recipe:

Lemon Herb Salmon

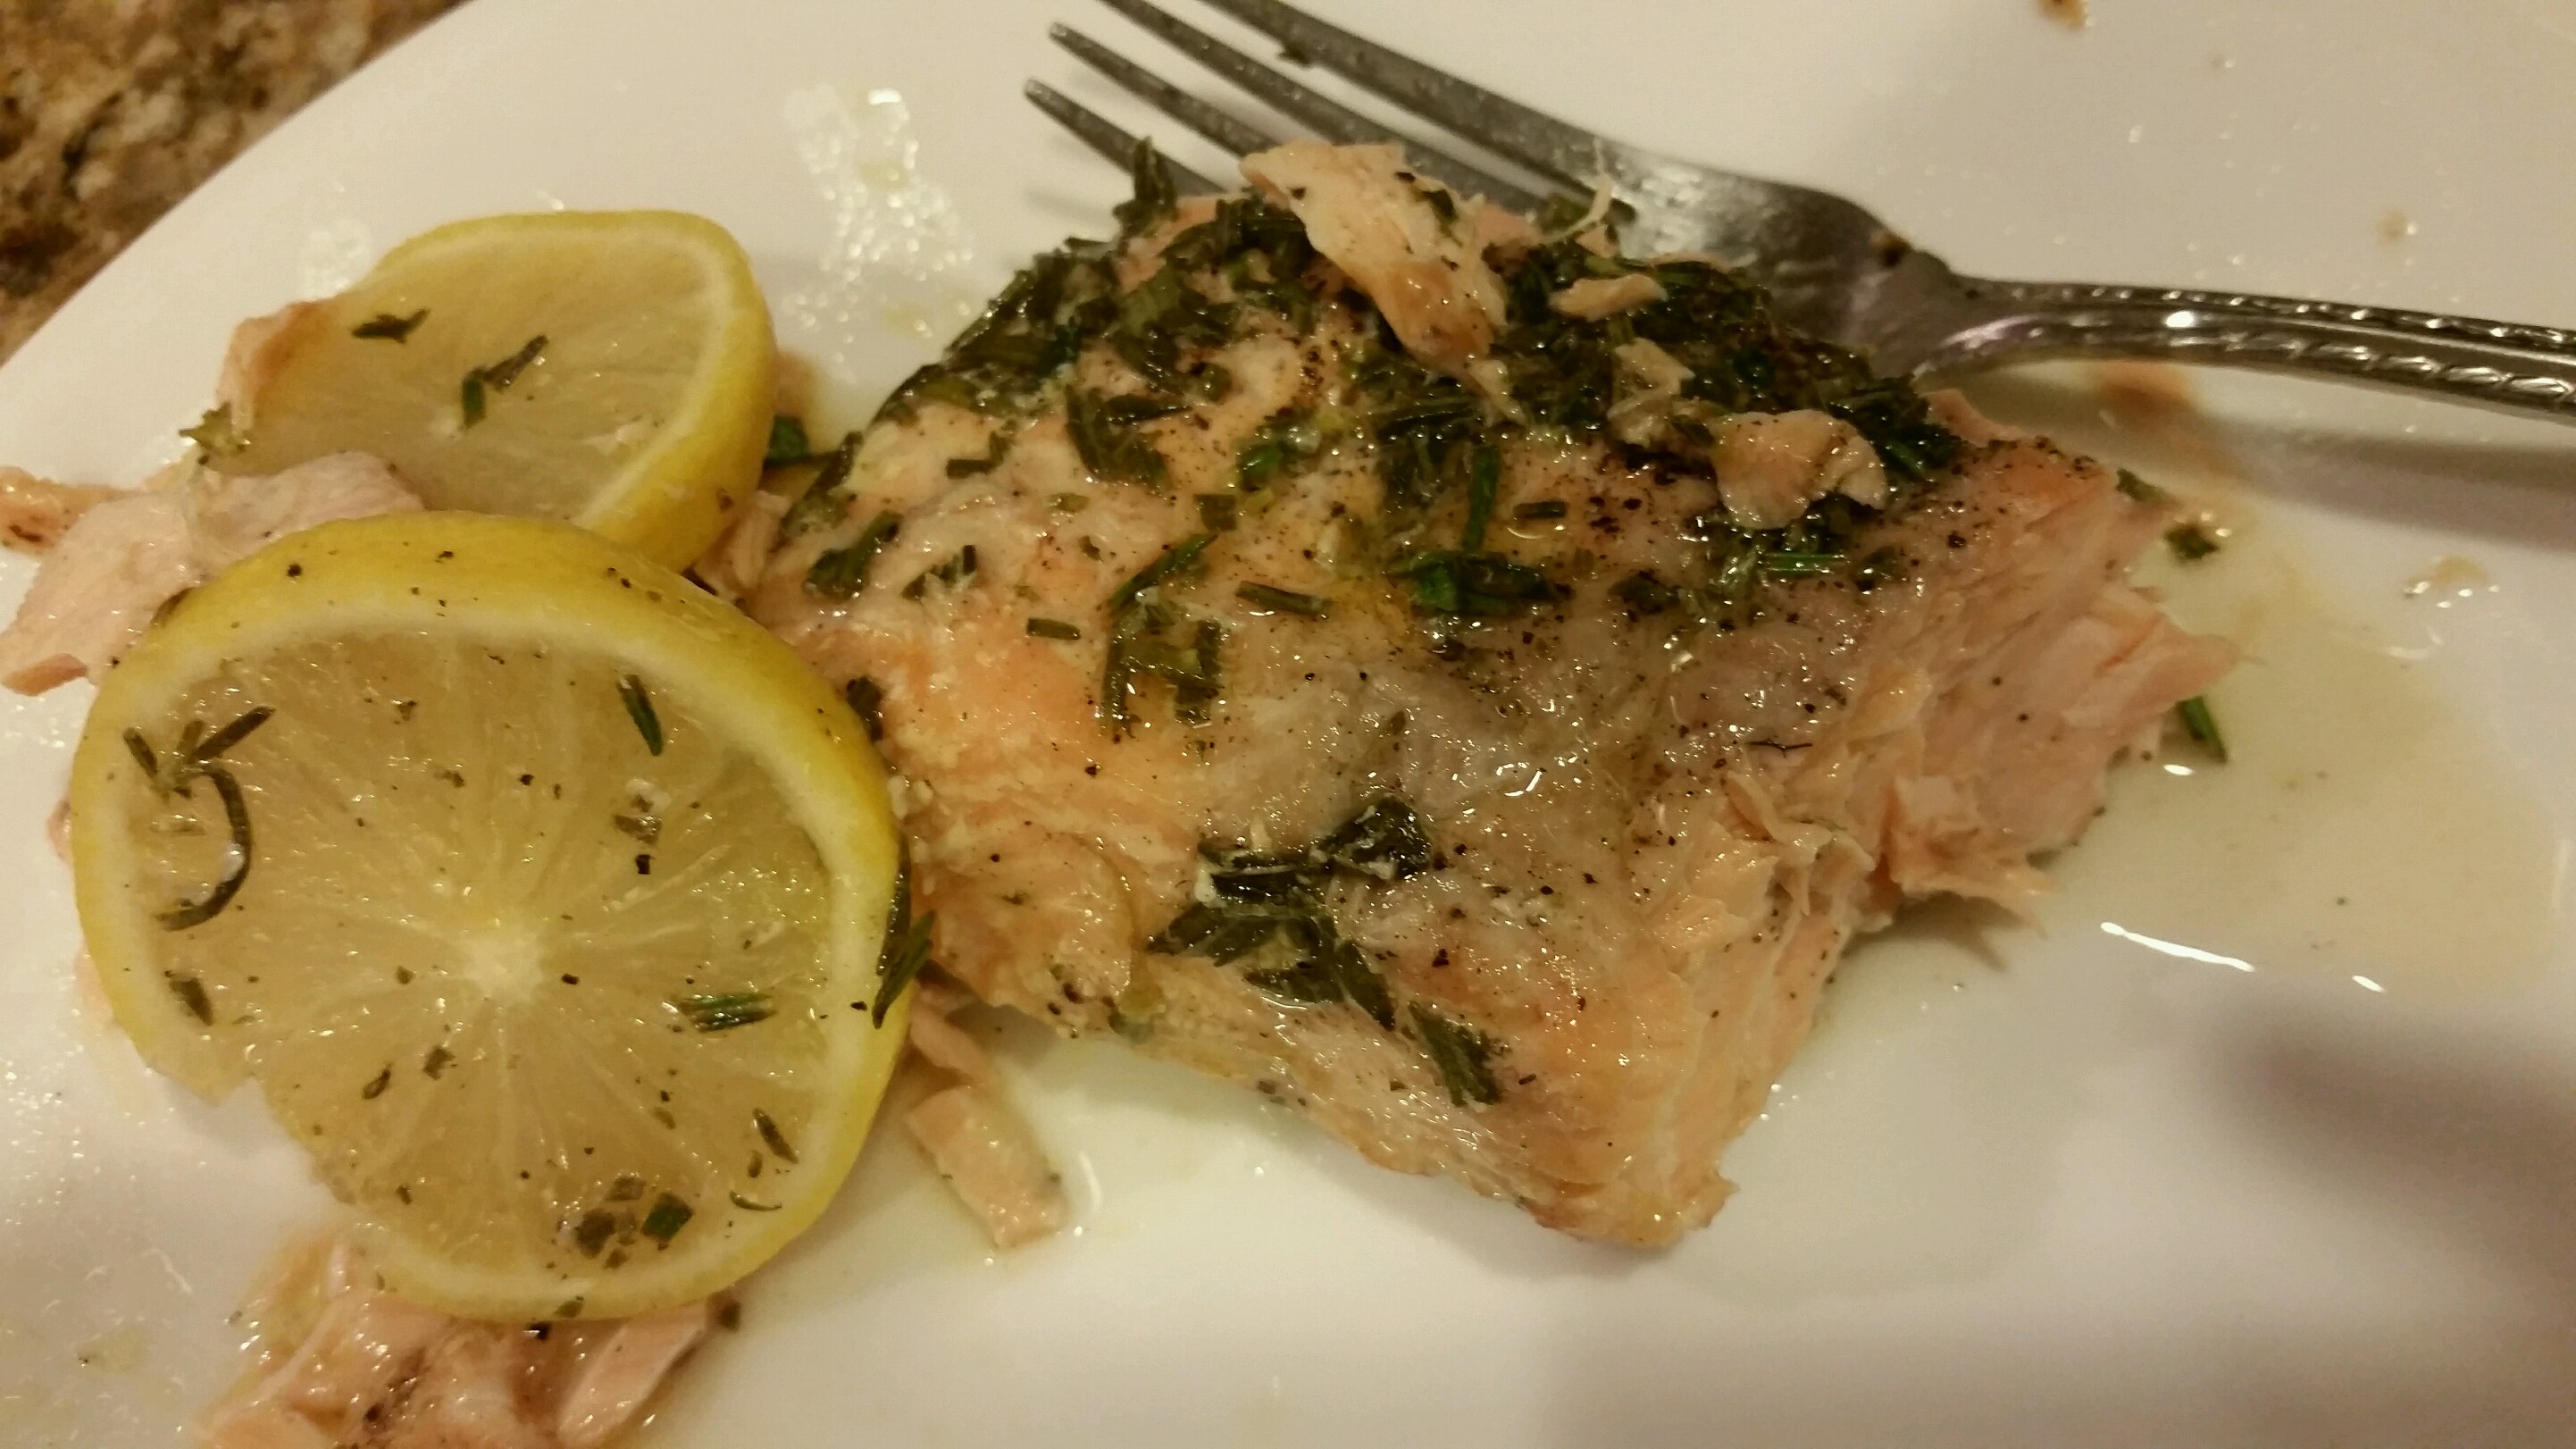
A quick and easy weeknight recipe that tastes good and doesn’t require any effort – sounds like something I can go for all the time.  I’m not a fish expert by any means but I like to experiment whenever I can.  Here’s one of the simplest but tastiest (according to the husband) salmon I’ve made.

I got a 1lb wild salmon filet from the market (you can ask your butcher to take off the skin – I’ll admit, I hate doing that!)

Heat the oven to 400°F.  In a pan, line foil so it overflows about 2 inches on all sides.

Add the salmon, drizzle olive oil, salt and pepper on both sides.

Sprinkle finely chopped rosemary and thyme on the top.

20150923_192551

Cover with thinly sliced lemons

20150923_192715

Fold two of the sides over to make a handle.  Then fold over each of the other two sides so that none of the steam or liquid seeps out when it’s baking.

20150923_192846

Bake in the oven for 20 minutes.  When you pull it out, poke a couple of holes in to let the steam out before opening the foil completely.  Portion out into two servings and serve with rice and your favorite veggies!

16361

Makes 2 servings so it’s perfect for a date night!

Ingredients: 

1lb salmon filet
1Tbsp finely chopped rosemary
1Tbsp finely chopped thyme
1/2 lemon, thinly sliced
1Tbsp olive oil
Salt to taste
Pepper to taste

Instructions:

Heat the oven to 400°F.  In a pan, line foil so it overflows about 2 inches on all sides.
Add the salmon, drizzle olive oil, salt and pepper on both sides.
Sprinkle finely chopped rosemary and thyme on the top.
Cover with thinly sliced lemons
Fold two of the sides over to make a handle.  Then fold over each of the other two sides so that none of the steam or liquid seeps out when it’s baking.
Bake in the oven for 20 minutes.  When you pull it out, poke a couple of holes in to let the steam out before opening the foil completely.  Portion out into two servings and serve with rice and your favorite veggies!

Quinoa, Brown Rice and Black Beans

20150922_192054

Loaded with protein and yummy veggies, this is one of my new favorite go-to’s.  Simple to make and you can add whatever veggies you choose – I had colored bell peppers, tomatoes and onions in my fridge so that’s what I went with today.

Here’s how I made it:

Soak 1/3c Quinoa in some warm water for about 20 minutes.  This helps the seeds cook easier and softer.

Also soak 1/2c Brown Rice for 20 minutes.  Brown Rice can be tough to cook as it usually takes longer than white rice to make but if you soak it first, it comes out really nice and soft.

20150922_190435

Finely Dice colored Bell Peppers, Tomatoes, Onions and a couple of cloves of garlic.

In a nonstick pot, heat oil and ad the cumin.   Add the onions. garlic, tomatoes, bell peppers and mix well.

20150922_190940

Cook for 5 minutes, then add in the quinoa, rice and black beans.  Add some salt, pepper and just a touch of hot sauce – it adds that magical touch!   Add the water and bring to a boil.  Cook for about 30 minutes or until the rice is tender.  20150922_191538

Just before serving, squeeze some fresh lemon juice over the rice.  The extra zing tastes really good!  There you have it!  This is a great make ahead recipe and perfect for the fall.

Here’s the recipe all in one spot!

Ingredients:
½ c diced onions
½ c diced tomatoes
1c diced bell peppers (I like to include a variety of colors)
1 can (14oz) black beans, drained and rinsed
1/3 c Quinoa
½ c Brown Rice
1 tsp cumin
1 Tbsp Olive Oil
Salt to taste
Black Pepper to taste
1 tsp, freshly squeezed Lemon Juice
2 c Water
a couple dashes of hot sauce

Instructions:
Soak quinoa and brown rice in warm water for 20 minutes.
In a nonstick pot, heat oil and add the cumin.   Add the onions. garlic, tomatoes, bell peppers and mix well.
Cook for 5 minutes, and then add in the quinoa, rice and black beans.  Add some salt, pepper and the hot sauce.
Add the water and bring to a boil.  Cook for about 30 minutes or until the rice is tender.
Just before serving, squeeze some fresh lemon juice over the rice.