Fall Nourish Bowl
Warm up with this cozy Fall Nourish Bowl — packed with roasted veggies, quinoa, and creamy hummus for the ultimate autumn comfort meal. Nutritious, hearty, and full of seasonal flavor!
Continue reading “Fall Nourish Bowl”

Warm up with this cozy Fall Nourish Bowl — packed with roasted veggies, quinoa, and creamy hummus for the ultimate autumn comfort meal. Nutritious, hearty, and full of seasonal flavor!
Continue reading “Fall Nourish Bowl”

Discover a fresh take on hearty veggie barley soup! Packed with vibrant, nutrient-rich vegetables, this homemade version brings comfort and flavor without the heaviness. Perfect for cozy days or when you’re craving a healthy, feel-good meal.
Continue reading “Lentil Barley Soup”

Indulge in the aroma of Healthy Chocolate Muffins that captivate with the rich scent of wholesome ingredients. Discover a balance of nutrition and flavors as avocado, spinach, and carrots come together, creating a delightful treat that satisfies sweet cravings while nourishing your body. Dive into a world where the irresistible fragrance meets a symphony of flavors, making these muffins a wholesome delight for both kids and adults alike.
Continue reading “Healthy Chocolate Muffins”

This Vegan Thai Red Curry will make you think you’ve brought the restaurant home. Delicious, versatile, and finger licking good, every bite will have you wanting more.
Continue reading “Vegan Thai Red Curry”

This vegan, nutritious poke bowl filled with lots of veggies and a sriracha dressing is so delicious and addicting. A one-bowl recipe with so many beautiful ingredients and easy to make is a perfect meal that is customizable for your palate.
Continue reading “Vegan Poke Bowl”

One of my favorite times of the year is the spring when the Farmer’s Market starts to get bigger with more and more farmers who start to bring a larger variety of produce and goodies. I’ve mentioned in the past that I like to make a menu for the week (more so my kids don’t complain they want something else than what is served), but what I haven’t mentioned is how I love going to the Farmer’s Market to do my weekly produce shopping. Sometimes, I will even tailor some of my dishes to include produce I find at the Market.

Recently, I partnered with our local Farmer’s Market (Danville Farmer’s Market) and I will be creating recipes for them a few times a month in the hopes that I can bring awareness to locally farmed produce at all of our farmer’s market. Having fresh, organic produce and supporting the local farms is a win-win.

This Spring Crudites Platter is so beautiful, we all had a bit of hard time digging in. No one wanted to mess it up. Ah well, our stomachs won that round. The beauty of this platter is that you are not restricted to the same produce I picked up. Pick up what your farmer’s market has, just make it colorful.

Here is what I used:
As for the hummus, I chose purple sweet potato and red beets to be the base of each hummus. For the Red Beets, I roasted it with garlic, then pulsed it with a little tahini and a few other ingredients. This is by far one of my favorite variations on hummus. Paired with all that beautiful produce, it’s perfect!

For the Purple Sweet Potato, I baked it in the oven then pulsed it with tahini as well. Though the idea behind both hummus’ are the same, the flavor profile differ vastly. Yet both are addicting.

I hope you have a chance to make a beautiful Spring Crudites Platter like this for your next gathering. I promise you will love it.

Try it out and let me know what you think!
Here are the tools I used for this recipe:

If you are looking for more delicious recipes, check these out:
Roasted Masala Chickpeas
Roasted Red Pepper Hummus
Spicy Garlic Hummus
Crispy Chickpeas and Sweet Potato Tacos

This one pan salmon is perfect for a busy weeknight meal. Ready in 15 minutes, it’s a nutritious meal the whole family will enjoy!

I love the idea of using just one pot or a pan. Not only is cleanup easy but you don’t spend forever in the kitchen cooking after a long hard day of work. Don’t get me wrong, the kitchen is my happy place. But weeknights are crazy when the kids are hungry and don’t have the patience to wait for me to cook an elaborate dinner.

My favorite part is that the girls eat the rainbow veggies I add on the side. The colors look so pretty and the girls love their rainbows as much as I do. Chopping the veggies and seasoning them doesn’t take very long and adding that glaze on the salmon with a little honey and mustard mix is perfect to brighten up the salmon.

I kept the seasoning for the veggies pretty simple – salt, pepper, and a little dried oregano. Why? Because I want the salmon to shine too. The veggies have their color that attracts you to them so the salmon should have something too, right? The glaze is very easy to make. Just mix a little dijon mustard, honey, garlic, and of course fresh squeezed lemon juice. Brush it on to the salmon and voila! All that is left to do is bake!
From my kitchen to yours, I hope you enjoy this easy and delicious One Pan Salmon with Rainbow Veggies!
Here are the tools I used for this recipe:

**Originally published Jun 2017, edited and updated Feb 2021.
Poblano What?! A burger with Pav Bhaji?! Yep you heard it right. A Pav Bhaji Burger….. with Poblano Peppers. Pav Bhaji is a very popular dish in India and among Indians everywhere in the world. Back in the 1800’s, workers would take leftover veggies and turn it into a curry. These workers usually could not afford much so they became creative. I piggy backed on that creativity and put my own spin to a classic Indian dish. Continue reading “Poblano Pav Bhaji Burger”

Breakfast is always the hardest meal for me to be creative with. I’m constantly trying to make different foods to keep the days going and prevent burnout on any single dish. We’ve cycled through oatmeal, yogurt parfaits, eggs in all forms, muffins, and so many other variations of the above!

I had some crepes leftover from another meal and decided to use them for breakfast. You can make the crepe batter fresh in the morning or pre-make your crepes and store them in the refrigerator or freezer.

Go nuts with the filling. I kept it simple with some sautéed spinach and cheese but you can add in turkey slices, ham, bacon, or other veggies like tomatoes, squash, and onions.

From my kitchen to yours, I hope you enjoy this breakfast!

By now, I’m sure you’ve heard of my friend Janani. I’ve mentioned her in a few recipes, especially the Greek Inspired Crepes and Instant Pot Kali Dal. She and I met when we were both about 7 months pregnant with our first child at an Indian store where the owner introduced us. We have been pretty close friends since and shared many recipes during our play dates and this one is inspired by her.
Yum
When Aishani was a few months old, I remember Janani came over for a play date with her eldest. She brought over this batter and asked if I had veggies she could use. I was extremely curious as Sanaya was in a picky phase (honestly, I feel both my kids have always been in a picky phase!).
She explained what Adai is and I was instantly fascinated. Basically, it is a batter made out of 4 different lentils and a little bit of rice, soaked, ground, and cooked over the stove with veggies similar to a dosa or crepe fashion. So with one meal, I’m getting protein, fiber, non-dairy calcium, folic acid, and plenty of vitamins and minerals from the veggies. Seriously, major mom win! My kids love it and eat it with yogurt and it’s a family hit.
The basic batter recipe is Janani’s. I’ve never tried to change it because it’s perfect and it works. I did play around with it and turned the Adai crepes into waffles. It’s something fun for the kids; they get a kick out of eating waffles for lunch or dinner and I know it’s one of the healthiest waffles around! The texture keeps well and tastes so soft and fluffy. It’s really delicious.
For the girls, I served this with yogurt as that’s their favorite way of eating Adai. For the hubby and I, we had a topping of masala salsa on top which tasted amazing and completed this dish for us!
From our kitchen to yours, we hope you love these Adai Waffles!
A savory lentil waffle filled with veggies that is healthy and delicious.
Notes:
1. The ratio of all the lentils and rice is always 1:1. Whether you want to make a lesser amount or more, the ratio before soaking will remain the same.
2. It is important to soak these lentils at least 4 hours. Soaking lentils helps remove the phytic acid which impairs the absorption of nutrients such iron, zinc and calcium.
3. If you make extra, and want to keep it for future use, you can store in the freezer. Just be sure to keep the batter plain without adding any of the ingredients as it will ruin when you thaw it out. Stores well up to 3 months in the freezer. Stores well up to 3 days in the fridge.
4. Parboiled or Idli rice works great for this recipe. If you don’t have it, regular jasmine rice works, but just be aware that when it is ground, you will get a bit of a grainy texture.
5. It is important to shred the veggies to help them and the lentils cook through properly. If the veggies are chopped and chunky, the lentils may not cook through completely (I speak from experience).
6. Use any veggies you have in your fridge. I’ve listed our favorites below.
Ingredients:
For the batter:
½ c urad dal
½ c chana dal
½ c red masoor dal
½ c idli rice / parboiled rice
For the Waffles:
1 zucchini, shredded
1 large carrot, shredded
½ c broccoli, shredded
1″ ginger knob, shredded
1 tsp hing (asafoetida)
1 tsp salt
For the Masala Salsa:
½ c onions, chopped finely
1 tomato, chopped finely
1 serrano pepper, chopped finely (for a less spicy option, take out the seeds and ribs)
¼ c cilantro, chopped finely
1 lemon, juiced
1 tsp salt
1 tsp cayenne pepper
1 tsp chaat masala
Directions:
For the Masala Salsa:
1. Mix all of the ingredients tog⁸ether in a bowl and set aside to use for topping.
For the Adai Batter:
1. Soak each of the lentils and rice separately in water at least for 4 hours, preferably overnight.
2. Once they are soaked, add rice (drained of water) and red chilies to a blender with 3 Tbsp water. Blend to a thick batter.
3. Transfer to a bowl and repeat process with the lentils. If you want to combine them and blend them, that works also. Add water a little at a time so the batter is not too thin.
4. Mix this batter with the rice batter.
This batter is your base. You can make it ahead of time and store it in the fridge or freezer and use as needed.
For the Waffles:
1. In a bowl, add 1½ c Adai batter, hing and salt. Mix well.
2. Fold in the shredded veggies. If the batter is too thick, add in water, 1 Tbsp at a time, but don’t make the batter too thin and runny.
3. Heat the waffle maker on high and spray both sides with cooking spray.
4. Using a ladle, pour the batter into the waffle maker and spread across. Close the waffle maker and seal or flip and let it cook as a regular waffle.
5. Remove the waffle and repeat the process for the remaining batter.
6. To serve, spoon some of the masala salsa on top of the waffles and serve hot!
Serve with masala salsa, yogurt, mango pickle or all 3!
Enjoy!

Rainy days always inspire a bowl of soup from my kitchen. This particular stew is inspired from my love of including rainbows in my food. Even better, it’s a one pot meal that’s easy to make with staple ingredients already in your pantry/fridge. Continue reading “Rainbow Lentil Stew Yum “
Rainy days always inspire a bowl of soup from my kitchen. This particular stew is inspired from my love of including rainbows in my food. Even better, it’s a one pot meal that’s easy to make with staple ingredients already in your pantry/fridge. Continue reading “Rainbow Lentil Stew Yum “

These days, I’ve seen and heard friends and family tell me they are working harder than ever, missing meals during the day. Some are working from home trying to manage homeschool, work and life in general. Others have a profession that is an essential role to our community right now and are giving so much to us. While I hope missing meals doesn’t become daily routine, here is a breakfast omelette that will start out anyone’s day on the right foot! Continue reading “Masala Omelette Yum “

When my kids were younger, I had a bit of a hard time getting them to eat certain vegetables. Even today, my oldest will not eat any type of leafy green because it’s a “salad” and she doesn’t eat salads apparently. My youngest pretty much copies her Sissy and does whatever she says. Sanaya loves spinach….. if it’s cooked down into a saag, blended into her Popeye muffins or hidden in this veggie sauce.

This recipe came into being when Aishani was new to eating foods at about almost 1 year old. Sanaya used to love pasta and Aishani liked it because she was all about finger foods and rotini was big enough for her to hold in her cute little pudgy hands. Added benefit, I can make a batch, freeze it for future use on a last minute day.

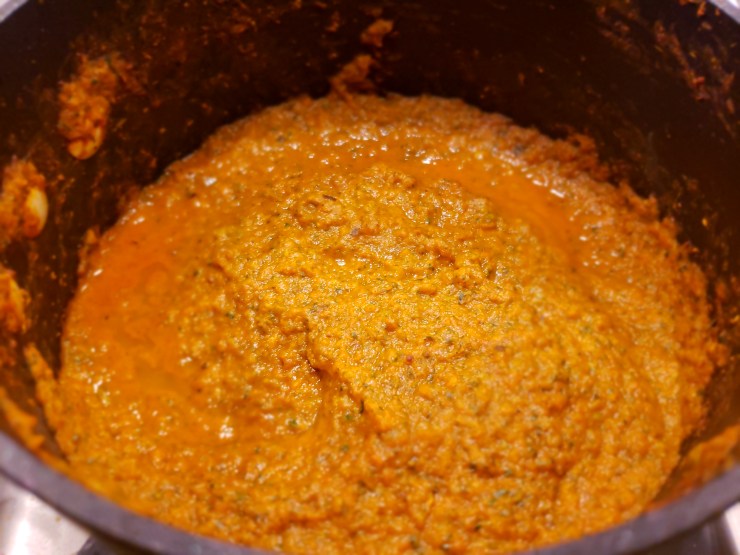
I load this pasta sauce up with onions, carrots, bell peppers, spinach, and frozen mixed veggies. I also add tons of spices including turmeric, especially in the winter which is rich in it’s anti-inflammatory properties. It’s such a healthy pasta sauce and my wonderful kids don’t even notice further than it being a red pasta sauce. Try it out…. trick your kids or even spouse and see if they notice the difference!

From my kitchen to yours, Enjoy!
Ingredients:
1 med onion, chopped finely
1 bell pepper, chopped finely
1 carrot, chopped finely
¼ c frozen mixed veggies
¼ c spinach
3 cloves garlic, minced
1 jar (about 1½ pounds) your favorite pasta sauce
¼ tsp ajwain (carom seeds)
¼ tsp haldi (turmeric)
½ tsp lal mirch (cayenne pepper)
¾ tsp cumin powder
1 tsp coriander powder
2 tsp Italian seasoning
1 Tbsp Avocado (or Olive) Oil
salt to taste
pepper to taste
Directions:
In a deep pot, heat oil on medium flame. Add in the carom seeds. When they splutter, add in the onions and sauté until translucent, about 3-5 minutes. Add in garlic and sauté for another 30 seconds. Add in the turmeric, and let it bloom for about 30 seconds.
Once the turmeric has mixed in well, add in all the veggies except the spinach, spices, salt and pepper. Mix well and cook for about 10 minutes or until they are tender. Finally add in the spinach and sauce and cook for 2 minutes stirring constantly.
Turn the flame off and with a hand blender, blend the veggies into the sauce. You should get a chunky consistency though if you prefer a more smooth texture, you can blend in a blender. If it’s too thick, add 1 Tbsp of water at a time until you achieve your desired consistency.
Taste and adjust for salt.
Serve with your favorite pasta!

I’m addicted to cooking shows. There. I said it. I admit it. I guess it’s not bad considering other things people are addicted to these days. Every Saturday mornings, you can find me glued in front of the television watching my favorite show, The Kitchen. I can’t bear to miss a single episode. A few weeks ago, they had guest chef Nikki Dinki on the show who shared her zucchini tacos recipe and instantly I knew I had to try those.
They are amazing! Forget eating them as tacos, my DH ate them on its own. SO DELICIOUS! I did make a few slight changes to her recipe to adjust for ingredients I had in the kitchen/pantry. Hope you enjoy them as much as we did!


Ingredients:
4 medium zucchini, shredded
2/3 c shredded Mozarella cheese
2/3 c Italian bread crumbs
2 eggs
1 tsp cayenne powder
1 tsp cumin powder
1/2 tsp salt
1/2 tsp garlic powder
Olive Oil Cooking SprayDirections:
Preheat oven to 450ºF.Place shredded zucchini in microwave safe bowl and heat on high for for about 3 1/2 minutes. Mix the zucchini around and replace in microwave for another 3 1/2 minutes. Let it cool then place in a cheesecloth and drain as much of the water out as you can. The drier it is, the better your batter and taco shells will turn out.
Add the eggs, cheese, bread crumbs, cayenne, cumin, salt and garlic powder. Mix well into a dough-ish batter. Line a baking sheet with parchment paper and spray lightly with Olive Oil Cooking Spray.
Make 8 portions in the shape of balls from the batter, the size just a tad smaller than a tennis ball. Flatten them directly onto the baking sheet into 5″ diameter rounds with your hands. They shouldn’t be too thick as the inside will not cook properly. Bake for 15 minutes. The taco shells should be slightly golden brown. Once you remove them from the oven, let them cool slightly before adding filling to shells.
Enjoy!
Original recipe by Nikki Dinki

This is one of my favorite recipes. It’s such a simple go to; you can wow friends and family, or just make it for dinner when you’re short on time or feel lazy enough to not make something elaborate. I originally found this recipe in a cookbook by Yotam Ottolenghi. I’ve since adapted it to suit my palate but regardless of which version you try, I’m sure you’ll love the impact of so many flavors and textures packed in such few ingredients.
Here’s what I did:
Preheat your oven to 400°F.

Line a baking sheet with some aluminum foil and place the eggplant on there, skin side down.

Bake for 20-25 minutes, until the eggplant is cooked through. Make sure it’s not overcooked, otherwise, it gets mushy and definitely does not taste good!
The eggplant should look something like this:

When you’re ready to serve, plate up some eggplant and drizzle a little tzatziki sauce over it. Finally, sprinkle some pomegranate seeds and enjoy.

Ingredients:
1 large eggplant, skin on, chopped in 2″ cubes
1 Tbsp dried thyme
1 Tbsp dried rosemary
1 Tbsp crushed red chili flakes
generous pinch of salt
1 Tbsp EVOO
1/2 c pomegranate seeds
Directions:
Preheat oven to 400°F
In a bowl, mix in the eggplant with the thyme, rosemary, dried chili flakes, salt and olive oil. Toss well so every piece of the eggplant is covered with all the herbs.
Line a baking sheet with aluminum foil and place the eggplant on there skin side down.
Bake 20-25 minutes until the eggplant is cooked through.
When you’re ready to serve, drizzle with tzatziki sauce and top off with pomegranate seeds.
If you’re interested in the original recipe by Yotam Ottolenghi, click here.

There are many days recently where we end up eating leftovers because well, with a 4 month old who wants all the attention, it’s hard to spend time in the kitchen when her drooly smile beckons you to play. Today however, the husband became the center of her attention allowing me a few moments to whip up veggie stuffed peppers. Layered with rice, veggies and definitely cheese – this is one yummy pepper!
There are a couple different parts to it so bear with me. Here’s how I made it:
For the rice:
In a nonstick pot, heat up some oil. Add the cumin and wait till it starts to splutter. Add the onions and saute till they turn translucent. Oh boy! The kitchen smelled so good with just the cumin and onions cooking together, I couldn’t wait till it was done so I can just dig in!

Once the onions are translucent, add in the tomatoes. Be careful! Don’t add the tomatoes when the onions are not done cooking. The acid from the tomatoes prevents the onions from cooking all the way through and this will change the flavor profile.

Saute the tomatoes for a couple more minutes until they are tender. Add in the rice and saute for a couple of minutes so it can soak in some of the flavor. Then add in the veggie broth, salt, and taco seasoning. Mix well and let it cook for about 20 minutes until the rice is tender. Turn off the heat and cover the pot. This is key whenever I make any type of rice – letting the rice sit in its own steam for 5 minutes. This ensures the rice is nice and fluffy and makes it taste so much better!

For the Veggie Stuffing:
Heat some oil in a nonstick pan. Add the onions and garlic and saute for a couple of minutes. Add in the yellow squash and zucchini and continue to saute for another 5 minutes. Add in the black beans, salt, fajita seasoning, cayenne pepper and cumin powder. Mix well and cook for another 2-3 minutes.

To assemble the peppers:
Preheat oven to 375°. Spray some cooking spray on a cookie sheet and line the peppers. Spoon some rice into the peppers, followed by the veggies and repeat till you reach the top. Sprinkle some cheese on the top and bake in the oven for about 15 minutes or until the peppers are tender. Serve hot and enjoy!
I’ve included the full recipe below. I hope you like it just as much as we did.

For the rice:
1/2c rice
1c low sodium veggie broth
1tsp onions
1/2c finely diced onions
1/2c chopped tomatoes
1Tbsp taco seasoning
1Tbsp Olive Oil
salt to taste
In a nonstick pot, heat up some oil. Add the cumin and wait till it starts to splutter. Add the onions and saute till they turn translucent. Once the onions are translucent, add in the tomatoes. Saute the tomatoes for a couple more minutes until they are tender. Add in the rice and saute for a couple of minutes so it can soak in some of the flavor. Then add in the veggie broth, salt, and taco seasoning. Mix well and let it cook for about 20 minutes until the rice is tender. Turn off the heat and cover the pot.
For the Veggie Stuffing:
1/2c diced zucchini
1/2c diced yellow squash
1/2c finely diced onions
1 14oz can black beans, rinsed and drained
2 cloves garlic, minced
1Tbsp Olive Oil
1Tbsp Fajita Seasoning
1tsp cayenne pepper
1tsp cumin powder
salt to taste
Heat some oil in a nonstick pan. Add the onions and garlic and saute for a couple of minutes. Add in the yellow squash and zucchini and continue to saute for another 5 minutes. Add in the black beans, salt, fajita seasoning, cayenne pepper and cumin powder. Mix well and cook for another 2-3 minutes.
To assemble the peppers:
2 bell peppers, halved, deseeded
1cup shredded cheese
Preheat oven to 375°. Spray some cooking spray on a cookie sheet and line the peppers. Spoon some rice into the peppers, followed by the veggies and repeat till you reach the top. Sprinkle some cheese on the top and bake in the oven for about 15 minutes or until the peppers are tender. Serve hot and enjoy!

*Updated Oct. 16, 2020
Sundays in our house are dedicated to football. Now that the season has started, I’m challenging myself to find some healthier recipes to get us through the games. Sure the chicken wings, nachos, creamy dips, and pizza sound good but they definitely don’t pass the healthy test. This is a hearty chili loaded with veggies, beans and definitely falls into the comfort zone. It makes you want to curl up on the sofa with a warm bowl while you’re watching football (or a movie or your favorite tv show).

The heat of the ancho chili and cayenne give this a perfect balance to some of the sweeter veggies like the carrots and bell peppers. Using the canned beans also take a lot of the work out of this dish for you and I’ve included both stove top and slow cooker versions so you can make it any way that is easiest and most convenient.

Add a squeeze of lime and a sprinkle of spring onions to finish off this chili before eating with a side of cornbread. Nothing can beat this delicious chili on a cold winter day. I’d like to say, I’m definitely ready for this winter season!

I’ve made this chili vegan and it can remain so with toppings such as spring onions, cilantro, avocado and lime wedges.
Optional to add are toppings such as sour cream and cheese. They will definitely soften up the taste if you choose these!
From my kitchen to yours, I hope this 3 Bean Chili brings a little warmth to your day!
I’ve made this both on the stove top and in the slow cooker. Here is the equipment I used to make the chili:

Updated Jan 4, 2020 from the original post published Sept, 2015.
Chicken pot pie is a family favorite in this household. My kids have been asking for this almost biweekly for the past couple of months. It makes me so happy that they would love eating my pot pie (though I secretly think it’s mostly because the name has “pie” in it). I have included in the recipe notes to make this recipe vegetarian and vegan so try it out and let me know what you think!

A hack that I have been known to use on occasion is buying rotisserie chicken, shredding it up and using that instead of baking my own. This simply cuts down on the time involved to make the pot pie. If you choose to go this route, remember to buy an herb roasted or seasoned chicken so that there is added flavor. You can also make these in individual ramekins to personalize them by adding chicken to those who want it and keeping it vegetarian for those who prefer not.

Making chicken pot pie on a busy weeknight may not be ideal but it you can totally make and assemble the pie over the weekend and simply bake it during any weeknight. Storage is easy as it can last in the fridge up to 5 days. So what are you waiting for? Make this your next meal and feel the comfort of home!

From my kitchen to yours, I hope you enjoy this delicious Chicken Pot Pie!
Here are the tools I used to make this recipe:


Loaded with protein and yummy veggies, this is one of my new favorite go-to’s. Simple to make and you can add whatever veggies you choose – I had colored bell peppers, tomatoes and onions in my fridge so that’s what I went with today.
Here’s how I made it:
Soak 1/3c Quinoa in some warm water for about 20 minutes. This helps the seeds cook easier and softer.
Also soak 1/2c Brown Rice for 20 minutes. Brown Rice can be tough to cook as it usually takes longer than white rice to make but if you soak it first, it comes out really nice and soft.

Finely Dice colored Bell Peppers, Tomatoes, Onions and a couple of cloves of garlic.
In a nonstick pot, heat oil and ad the cumin. Add the onions. garlic, tomatoes, bell peppers and mix well.

Cook for 5 minutes, then add in the quinoa, rice and black beans. Add some salt, pepper and just a touch of hot sauce – it adds that magical touch! Add the water and bring to a boil. Cook for about 30 minutes or until the rice is tender. 
Just before serving, squeeze some fresh lemon juice over the rice. The extra zing tastes really good! There you have it! This is a great make ahead recipe and perfect for the fall.
Here’s the recipe all in one spot!
Ingredients:
½ c diced onions
½ c diced tomatoes
1c diced bell peppers (I like to include a variety of colors)
1 can (14oz) black beans, drained and rinsed
1/3 c Quinoa
½ c Brown Rice
1 tsp cumin
1 Tbsp Olive Oil
Salt to taste
Black Pepper to taste
1 tsp, freshly squeezed Lemon Juice
2 c Water
a couple dashes of hot sauce
Instructions:
Soak quinoa and brown rice in warm water for 20 minutes.
In a nonstick pot, heat oil and add the cumin. Add the onions. garlic, tomatoes, bell peppers and mix well.
Cook for 5 minutes, and then add in the quinoa, rice and black beans. Add some salt, pepper and the hot sauce.
Add the water and bring to a boil. Cook for about 30 minutes or until the rice is tender.
Just before serving, squeeze some fresh lemon juice over the rice.


